


Got a code 43 last Saturday when leaving Cars and Coffee... I figured something wasn't right considering the ongoing issues with ignition/fuel/misfiring. One of the valves have been rattling since I got it, I think it's called a floating valve. I'm ordering some of the following:
Preface:
This is a guide for a competent mechanic or the mechanically inclined. I am not responsible for you dropping a valve into combustion chamber, proceed at your own risk and expect to self-rescue.
Parts:
Valve Springs - Mopar 53010388
Early 97-99 TJ's had a TSB for "weak valve springs" that caused them to prematurely wear out and cause the dreaded multiple code 43s.
Valve Seals - FEL-PRO SS72835
Engine assembly grease, I like Sta-Lube and it's got Molybdenum!
Prep:
The intention going into this will be to use the "rope trick" to keep from dropping any valves while I replace the springs. Rent a spring compressor for easy valve retainer removal, tie a knot in one end of the rope big enough that it won't disappear into the spark plug hole, and make sure you have about 2ft of rope at least. Get some kind of magnetic grabber tool too, you'll need it to capture the valve retainers.
Lay out your stuff and double check you have everything before beginning:


I had a syringe laying around so I put some grease into that for ease of application, the bottle it comes in is fine but the opening is too large and I don't like to waste stuff...
Procedure:
(I'm going to breeze through this section because I'm assuming you already know how to do the precursor steps.)
1. remove intake tube going from airbox to the throttle body, you'll need to disconnect the breather hose from the valve cover (leave it connected to the valve cover and "swing it away" for now, also you may want to disconnect the throttle cable or just swing it out of the way. I popped mine off and flopped it to the side.
2. Next, take a 7/16th deep socket and work your way around the valve cover removing the series of bolts. There are some plastic tabs holding things like wire loom and the heater core hoses, you will have to break these to get them off... or at least I did. Once those are all removed take a deadblow hammer and tap the valve cover a couple times from the side. Mine needed some convincing but once loose it shimmied right out.
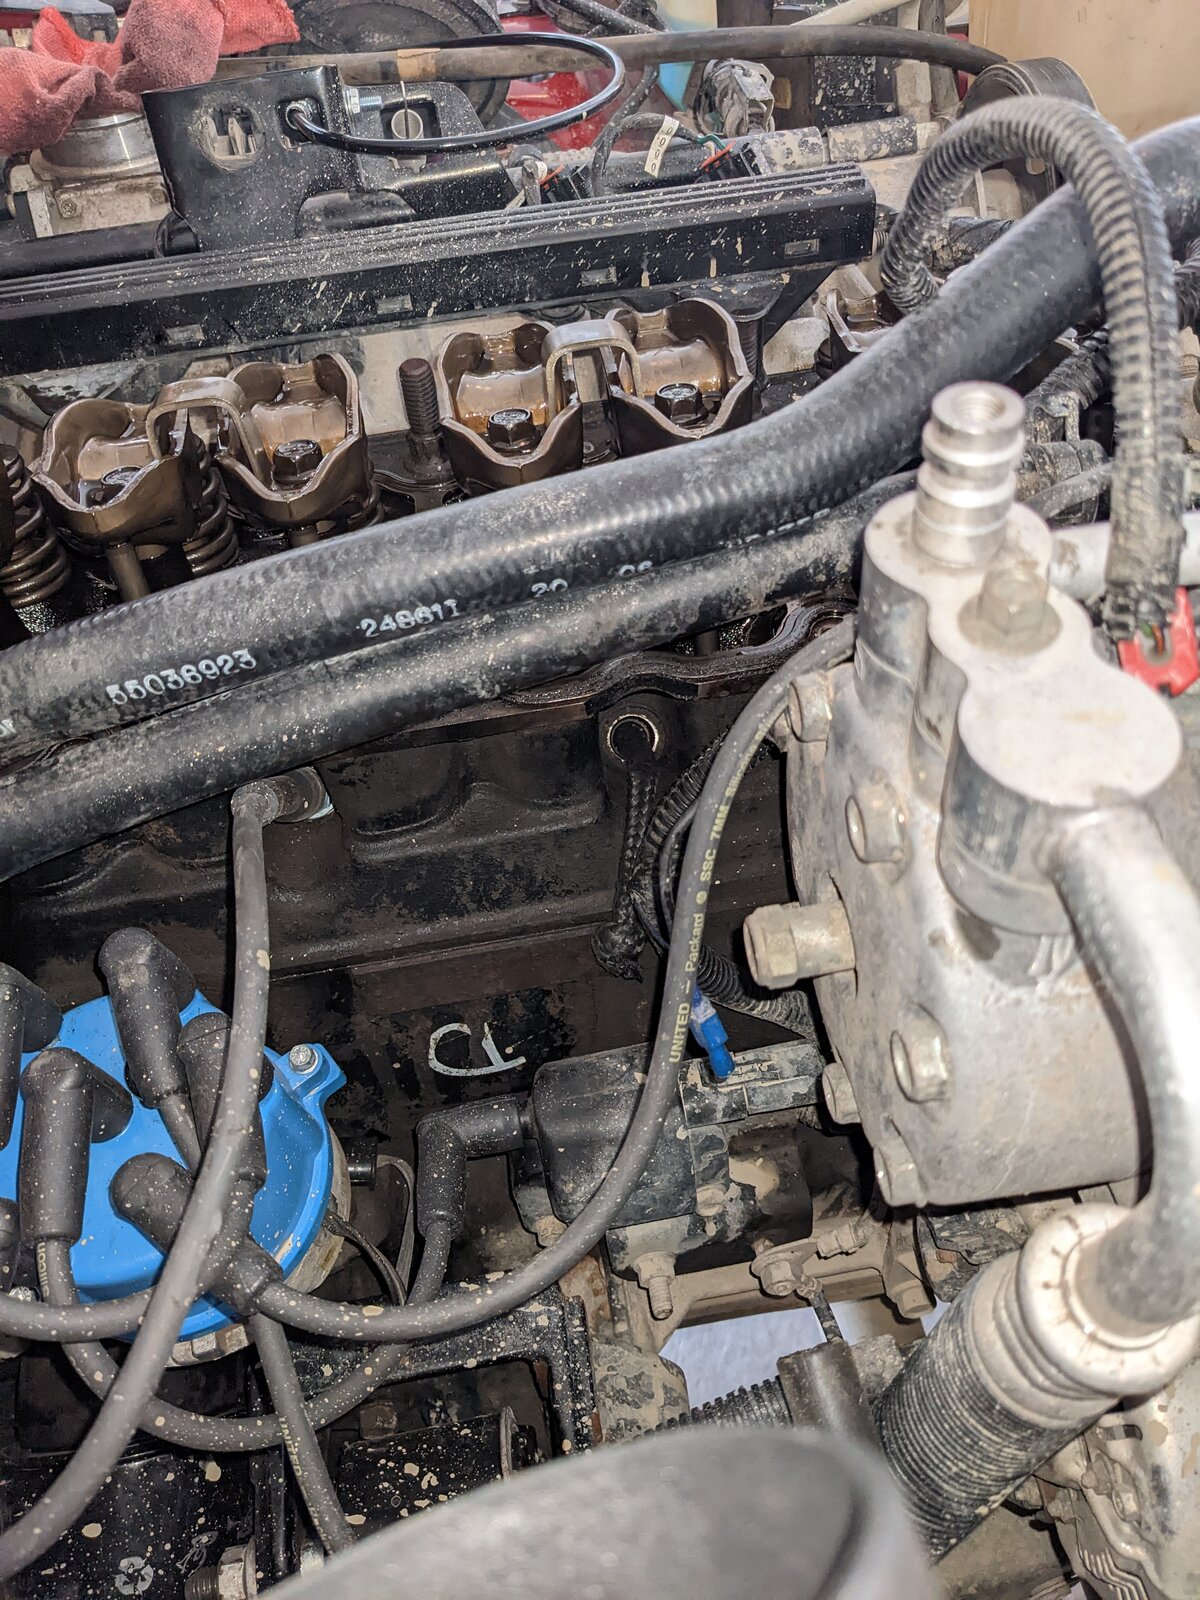
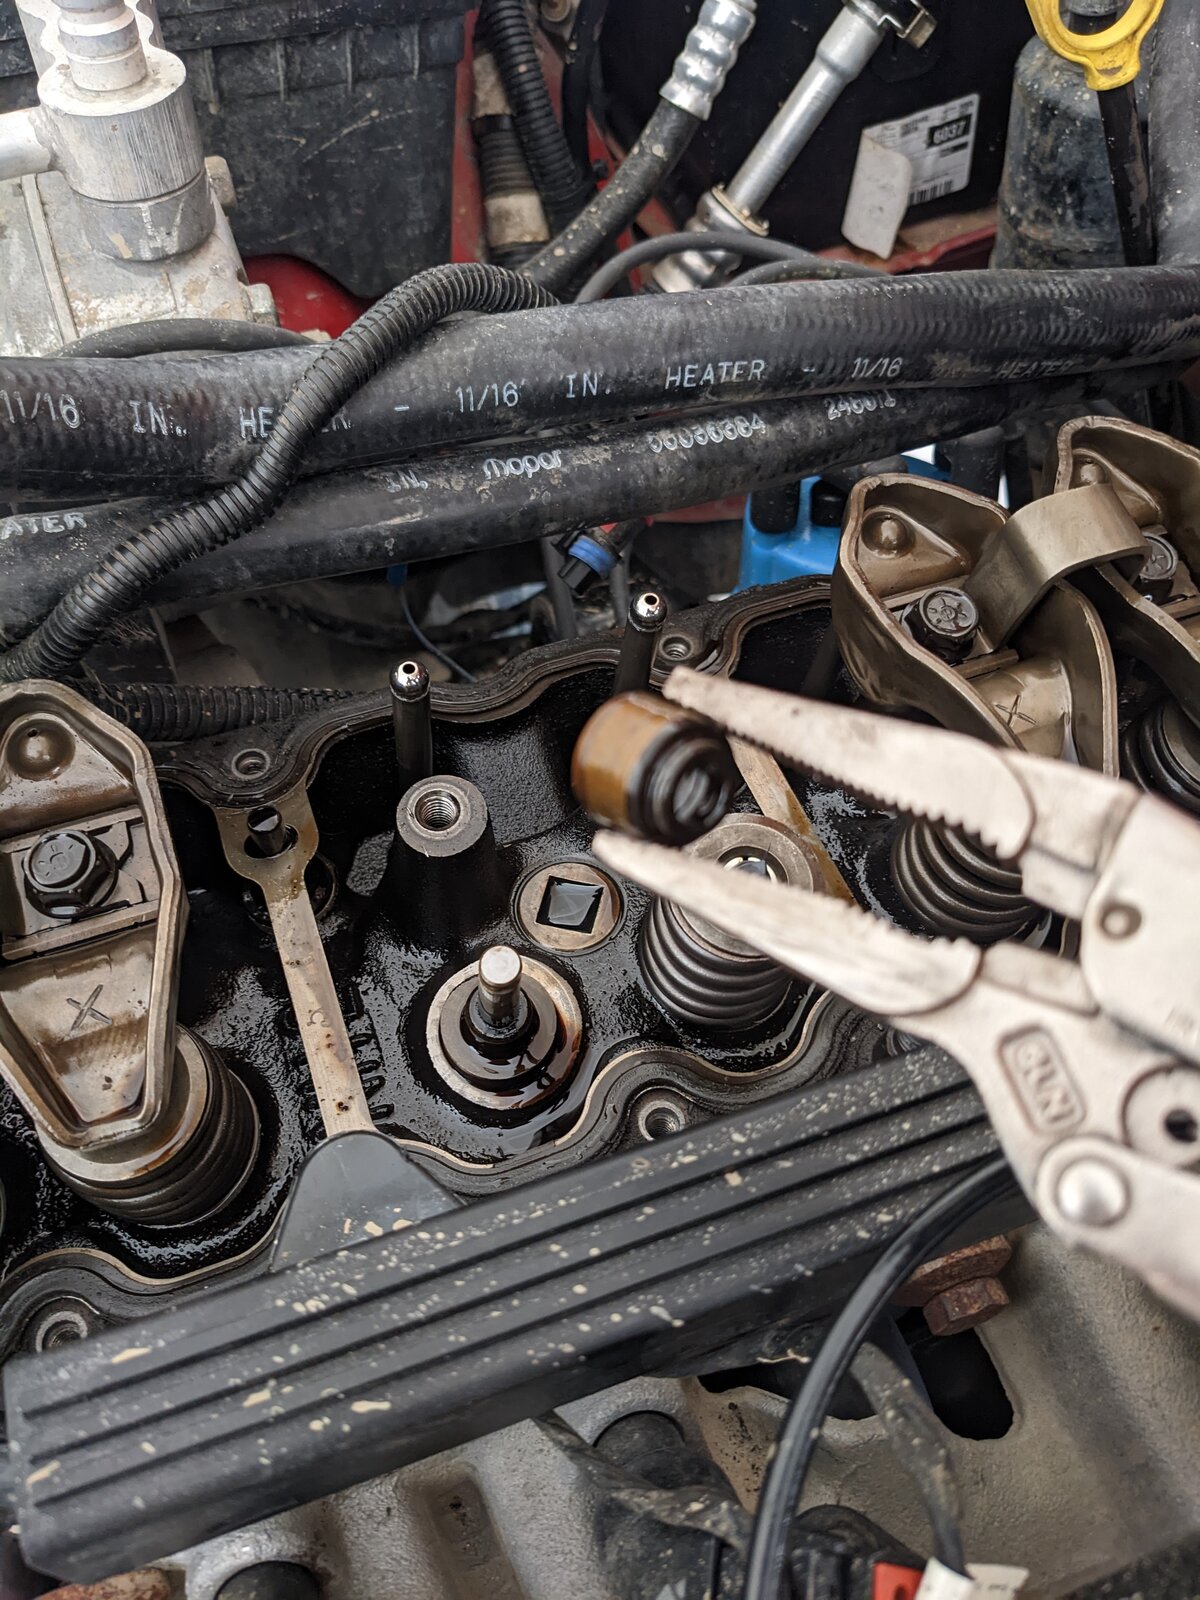
You should now be looking at a sight similar to this:

3. At this time, go ahead and loosen all the spark plugs. Remove only the one for the cylinder that you're working on to avoid getting gunk into the combustion chamber. Also, loosening them prevents compression building up during the steps ahead. I had to move the AC compressor to get to the Cyl-1 spark plug and have room enough to fit my fingers in there for feeding the rope.
4. Remove Spark plug, use a long screwdriver to poke into the hole to gauge the depth into the combustion chamber, then if you have enough room feed the rope into the hole while leaving a few inches dangling out for retrieval later.
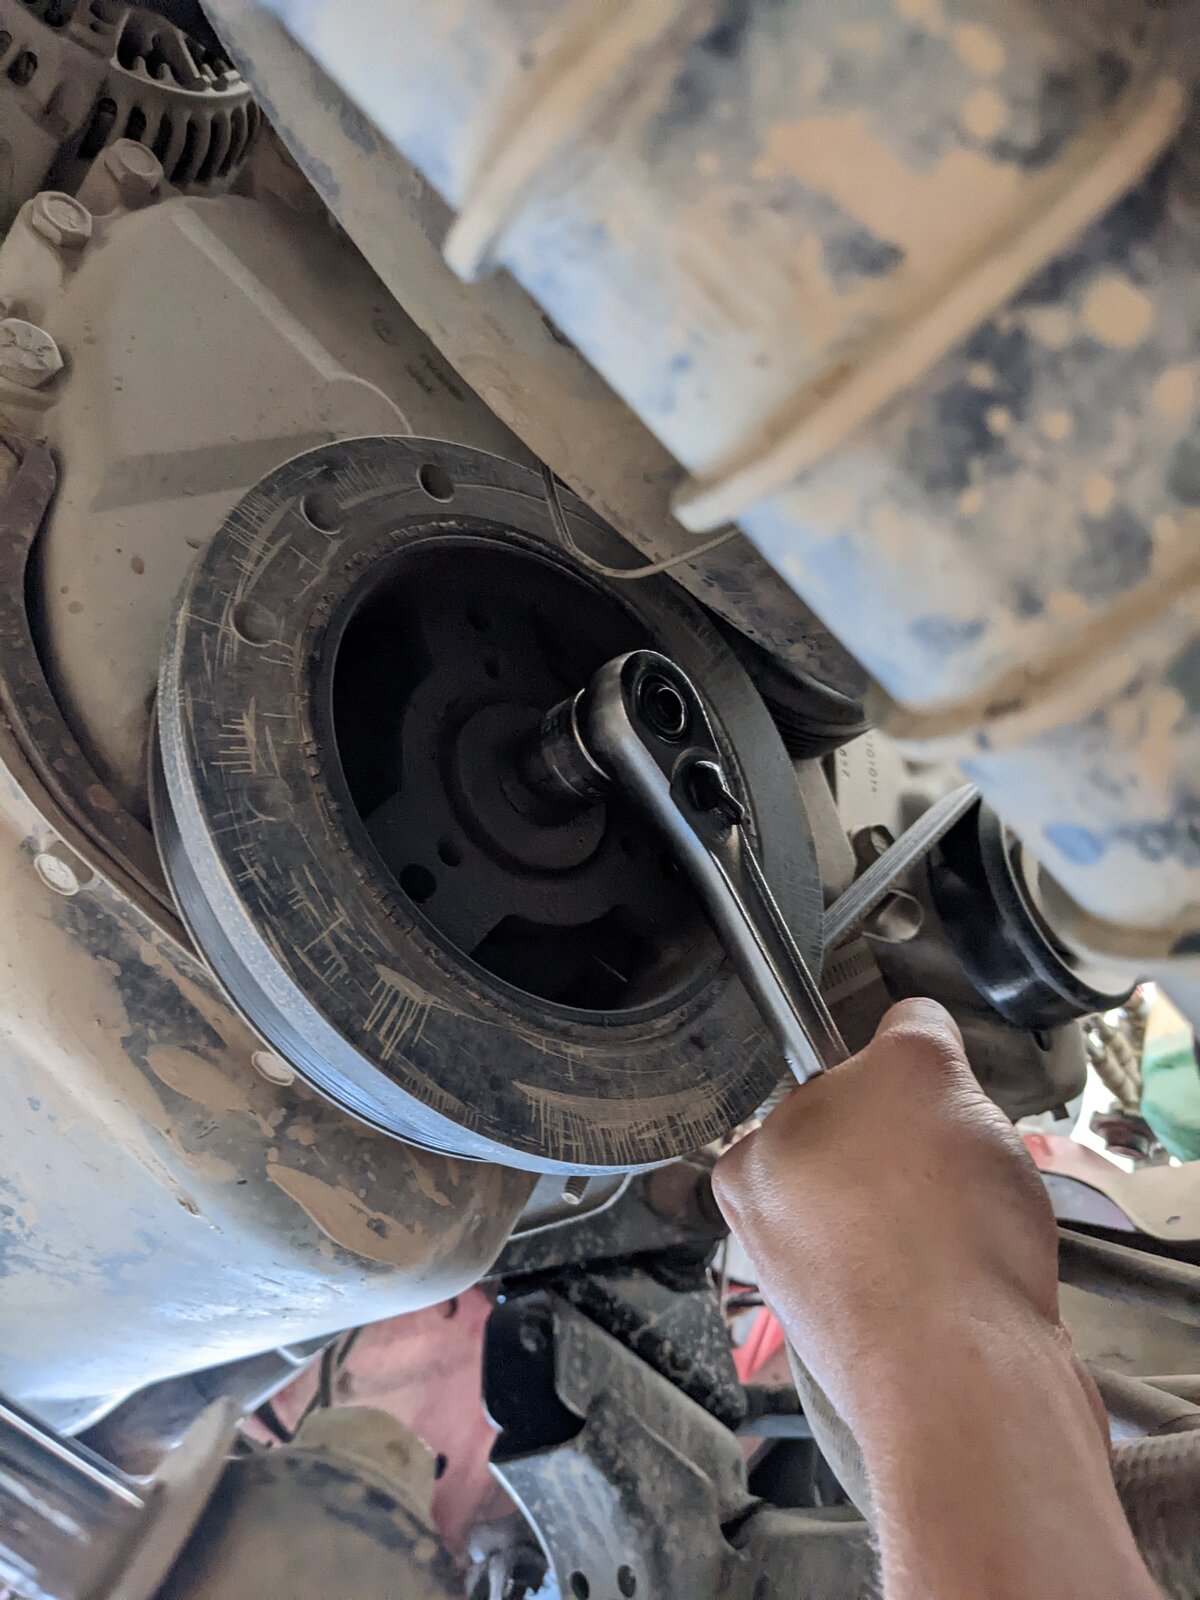
5. Next take your ratchet, I suggest 3/8ths or small ratchet, and turn the motor over by hand until you feel resistance. It should get firm, that's about when you know you've compressed the rope in the combustion chamber and you can proceed to the next step. sometimes this may take a few tries to get right. I got a little paranoid with how far the valves were moving as I was pulling things apart so I closed the gap a little by turning the crank a little more for ease of mind.
6. Remove the rockers, nothing to difficult here BUT... you MUST keep the same orientation per cylinder. meaning the intake rocker MUST match with the intake valve and the same with the exhaust for each cylinder. I did them one at a time because I didn't want to chase parts around my garage all day. Yes this may seem repetitive but it keeps your margin for error low. These bolts are not very tight at all, take note of this for later because you don't want to over-tighten them upon reinstall.
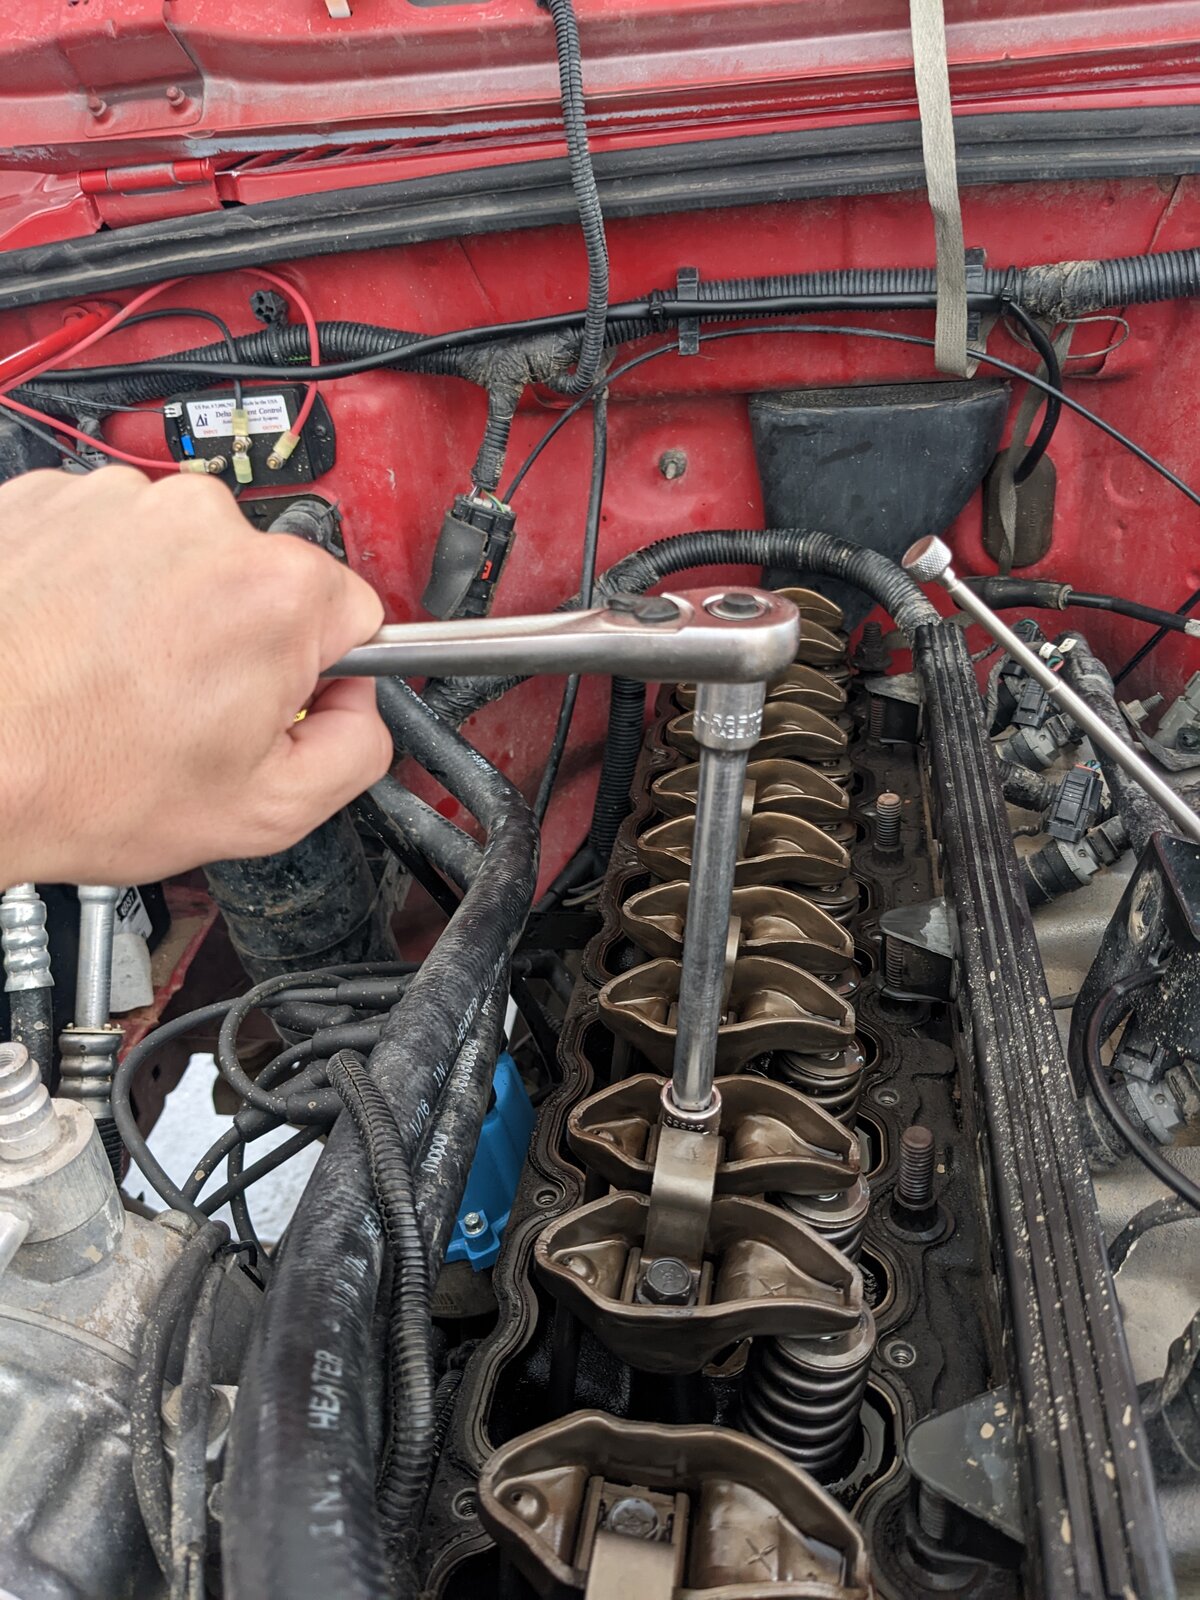
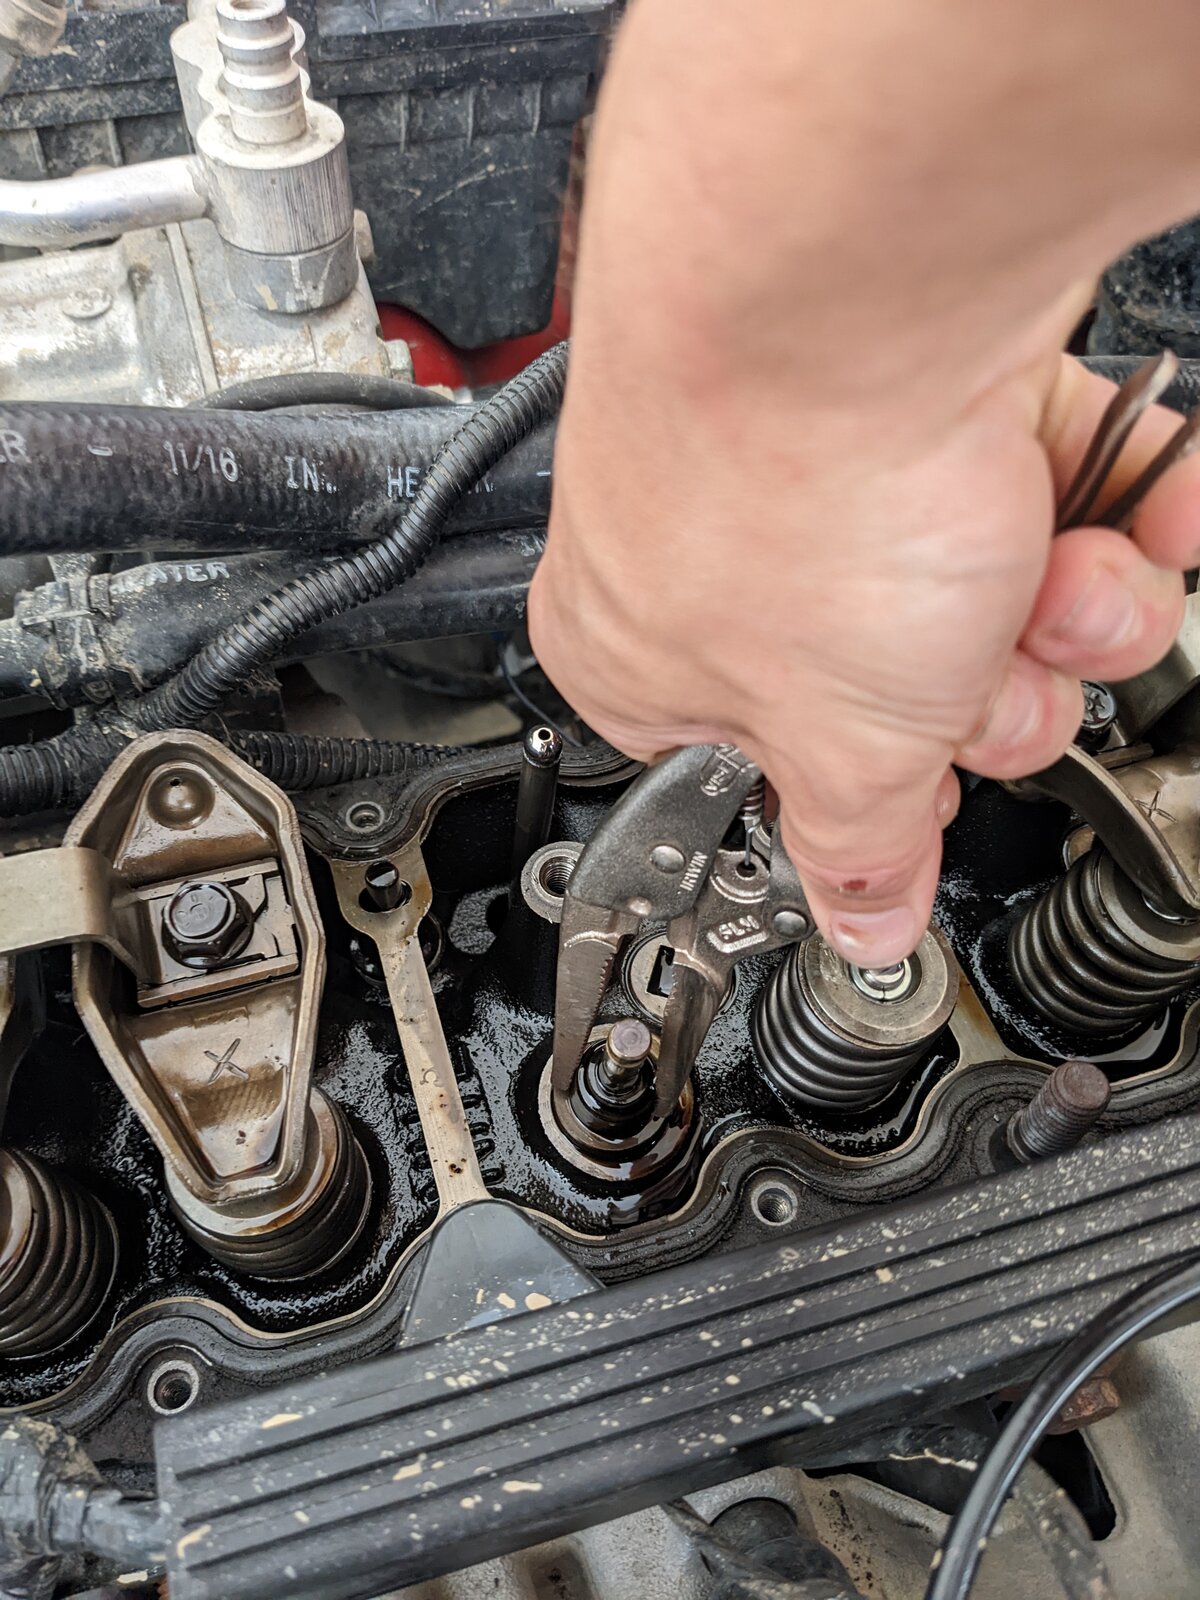
7. Next, line up the spring compressor with the spring and bolt it into the rocker stand like pictured below. Then leverage the compressor with one arm and hold a magnet above the spring retainers in-case they decide to jump out and escape. This may take a couple "pulls" because those valve retainers really like their home, but they'll pop. Remove the lever and the spring comes right out, take the spring seat with it.

8. Remove the valve seal. I used a channel-lock to create a snug fit on the seal, twist back and forth a couple times, then pull. It should pop loose with a firm pull. Toss it, you won't be needing that again.
9. Install the new valve seal. I sprayed mine with some seafoam deep creep to lubricate it first. Then pop the little plastic straw looking thing over the valve end because we don't want to damage the new seal upon install. Push the new seal over the cap and slide it down the valve to the seat. It will need some pressure to properly seat, I used a 12mm deep socket and a nylon hammer to tap it down.

10. Installing the new spring. Take note, there is a wrong way to install them, they are conical in shape and you will need to install the wide-side against the cylinder head with the spring seat on the narrow end. The pics below illustrate this:
Now, install the spring in the reverse order that you removed it. Make sure the valve retainers are properly installed into the groove before moving onto the next valve. I checked this by cycling the valve a few times with the valve components reinstalled. Before reinstalling the rockers I also greased all the mating surfaces: the pushrod cup, the rocker channel, and the top of the valve. During the process of replacing these components you're removing oil from these spots, it's important that you don't create a bigger problem down the road by starving these spots of lubrication before oil has a chance to buildup in the cylinder head again.

Once the valve retainers are seated you can now turn the crank back a few degrees and remove the rope.
Repeat Steps 6-10 for each valve until you've reached the final valve at the back of cylinder 6. There's a trick to this valve that I will explain in the next step.
11. Finally! The last valve, a tough one at that if you're using this same spring compressor tool. No worries, I gotchu covered. I cut a piece of leftover shock mount from my axle swap to make this but you can use any square tubing. 1-1.5in should be about right.
Lay the lever across the cylinder head as a leverage point, install the "special tool" with the curved edges facing down so it doesn't slip off the spring. Slowly turn the bolt and compress the spring while making sure nothing starts binding. Once the valve spring is compressed enough, lightly tap the top of the valve spring with a nylon hammer or deadblow a couple times to free the valve retainers. Then you're free to remove the special tool, spring, and seal like the other cylinders. Reinstall the valve retainers using the same method, it's a static system so you may need a little leverage to wiggle the spring seat around a little to get those valve retainers back into place.

Now you're in the clear, congrats! You're good to reinstall everything you removed to get to the valves.
The moment of truth: start the motor to check your work. Mine sounded a little different and there was a bit of a burning smell... don't worry. If yours is an early TJ with the weak valves theres a chance there's some carbon buildup in there that just needs to work it's way out.

 Reply W/Quote