Front Range 4x4 Upcoming Trail Runs - Add a New Trail Run

Page 18 of 18 FirstFirst ... 15161718
Results 341 to 348 of 348

Thread: 58 Willys Wagon

  1. #341
    Join Date
    Jul 2014
    Member
    #1546
    Last Online
    42 Minutes Ago
    Location
    Bozeman, MT
    Age
    46
    4x4
    1970CJ5 1958WillysWagon
    Posts
    3,710
    User Name
    FINOCJ
    Real Name
    James Orofino
    Thanks Given
    1,278
    Thanked 1,606 Times in 976 Posts

    Default Re: 58 Willys Wagon


    Next project on the 58 has begun....time to install the vintage powr-lok limited slip differential that I built this past spring....going to do a full rebuild of the 19spline D44 as well. Unlike a lot of modern D44s, this old school one has 2-piece axle shaft and wheel hub....Getting the hub off can be the hardest part of the whole deal - a big puller helps, as well as i pulled these for brake work a few years ago. They came off pretty easy...Note the old-school inboard brake drums - those will also be replaced with a more 'modern' bendix style self-adjusting drum set-up (as compared to these OEM Wagner manual adjusters).


    Getting this parking brake cable out through the backing plate was one of the PITA parts...turns out there is a special tool for this - I used a combination of pliers, vice grips, screw drivers and some well placed swearing:


    Here is the special tool - photo from a friend:


    There are a lot of pieces to get out before I tried to remove the entire axle housing or get R&p out.... I rebuilt the D44 in my cj, but this one definitely a bit more going on with the tapered hubs as opposed to the flanged axles...


    Once the axle housing was on the bench, it was time to get the R&P out and record helpful data....and I'll put them here for future reference if needed (like I loose my notepad)...these are the 'removal' numbers
    Axle shims - right side only: .085 total
    .060
    .010 x2
    .005
    *does not include the .155 retainer plate on each side

    Pinon - outer (small): .071 total
    .030 x2
    .005
    .003 x2

    Pinon - inner (large): .038 total
    .015 x2
    .005
    .003

    Ring gear Backlash: .010
    And a pic of the pattern before removal:


    The its time to remove the R&P...


    Still need to press off the inner pinon bearing, and to remove the carrier bearings - although I was hoping to wait until I had the clamshell bearing puller for that (waiting on overdue shipping). Last time i got them off with my large bearing splitter, but its not the best method, and it will probably damage them - I was hoping to make set-up bearings out of them. I can always work on getting the pinon installed with proper depth and preload while waiting....the pinon seal was at the end of its life as i could tell from the oil seepage, but it was rough enough that a bit of grit and moisture etc got in, and driving the pinon and outer bearing race out was a bigger PITA than I remembered. But overall, the bearings seem very good - guessing they never got a lot of miles on them, but mostly sat unused for many years. I replaced the gear oil a few years ago, but it was still pretty nasty....lots of carbon and thick gunk stuck on lots of stuff.


    I can also work on cleaning up the housing....and the last two things still in the housing are the inner oil seals that I need to pull....one of the axle bearings look to have red grease and one was black - so someone has been in here messing with things. In both cases, the 'grease' was very stiff, and what is sitting up against the inner oil seal is maybe grease mixed with clay and whatnot all caked and dried up.


    Anyway, I have all the bearings and shims etc as part of a rebuild kit I bought awhile ago, but need to order the axle/hub grease cups and oil seals....
    ___________
    James Orofino
    1970 CJ5
    1958 Willys Wagon

  2. The Following 2 Members Say Thanks to FINOCJ For This Post:

    Jim (November 3rd, 2023),Tom (November 3rd, 2023)

  3. #342
    Join Date
    Sep 2011
    Member
    #921
    Last Online
    4 Hours Ago
    Location
    Fort Collins
    4x4
    1990 Jeep Wrangler (YJ)
    Posts
    10,106
    User Name
    Jim
    Real Name
    Jim Williamson
    Thanks Given
    2,496
    Thanked 3,036 Times in 2,018 Posts

    Default Re: 58 Willys Wagon


    That "special tool" looks like something you could make in the shop.

    Are those axles considered full float?

  4. #343
    Join Date
    Jul 2014
    Member
    #1546
    Last Online
    42 Minutes Ago
    Location
    Bozeman, MT
    Age
    46
    4x4
    1970CJ5 1958WillysWagon
    Posts
    3,710
    User Name
    FINOCJ
    Real Name
    James Orofino
    Thanks Given
    1,278
    Thanked 1,606 Times in 976 Posts

    Default Re: 58 Willys Wagon


    Jim previously posted:
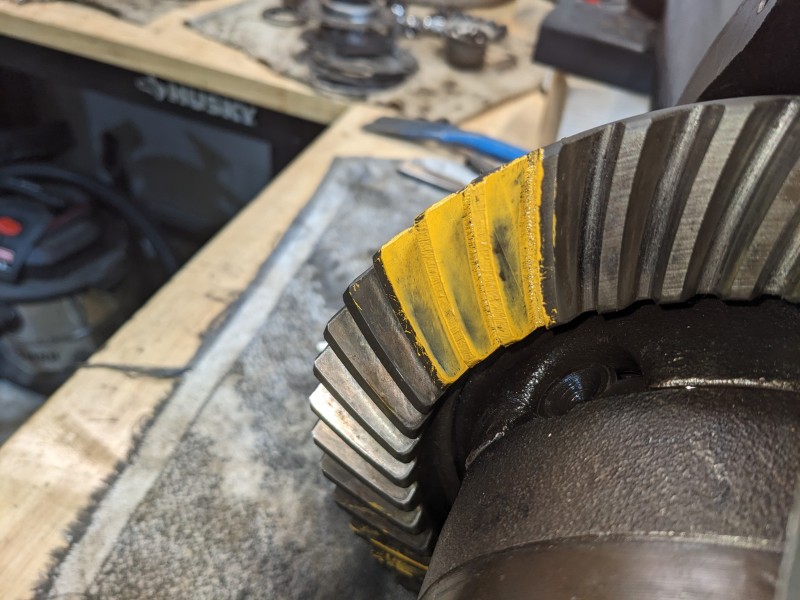
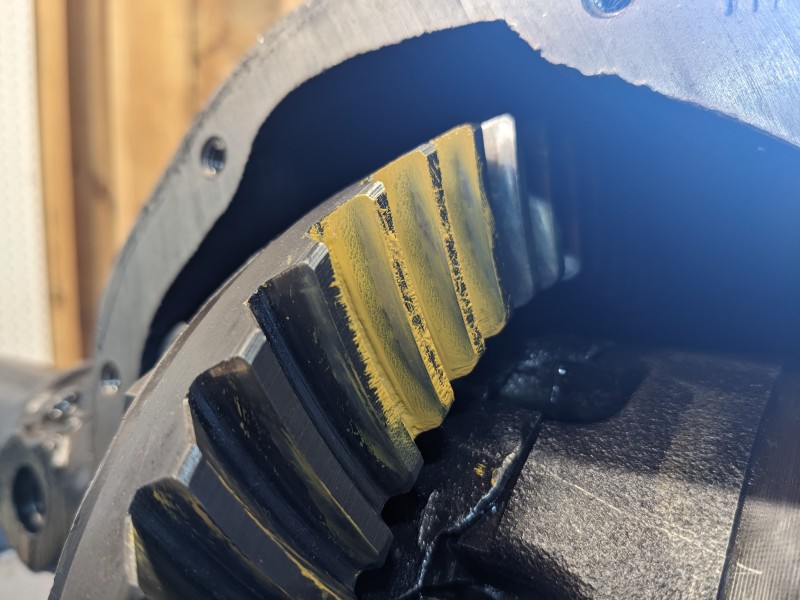
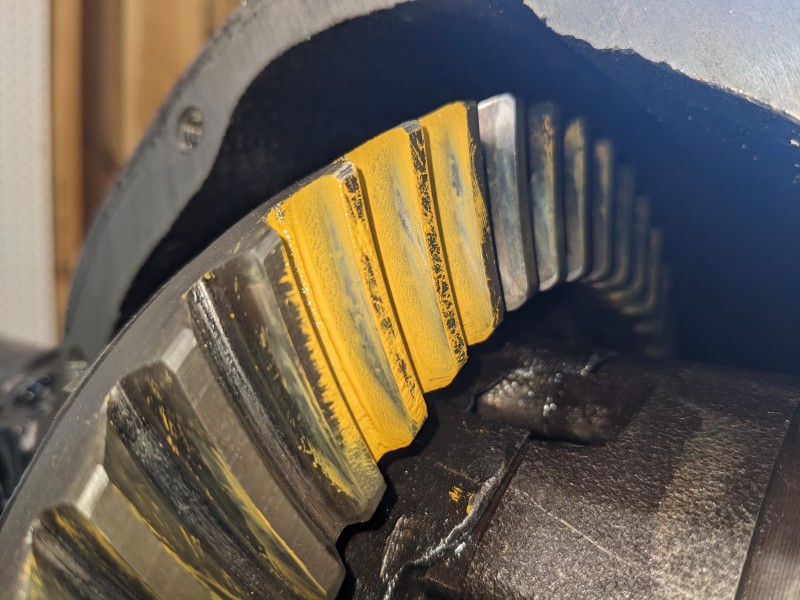
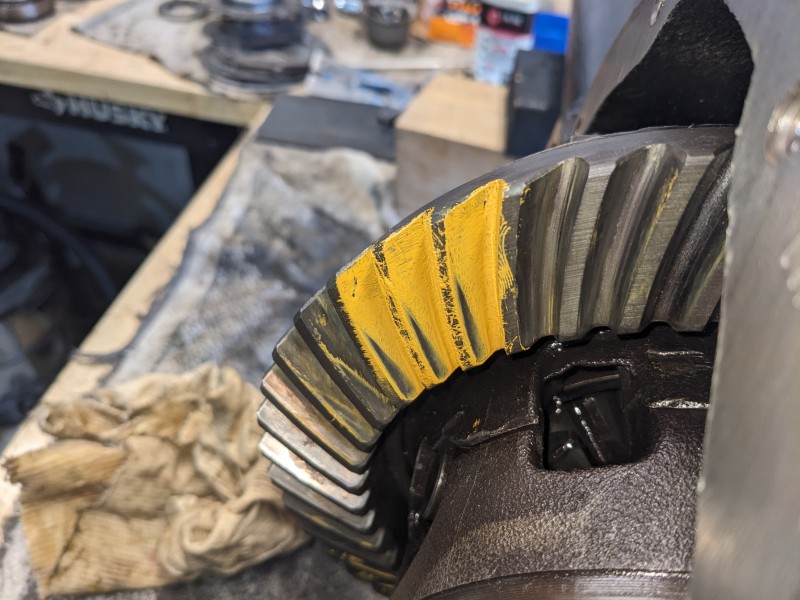
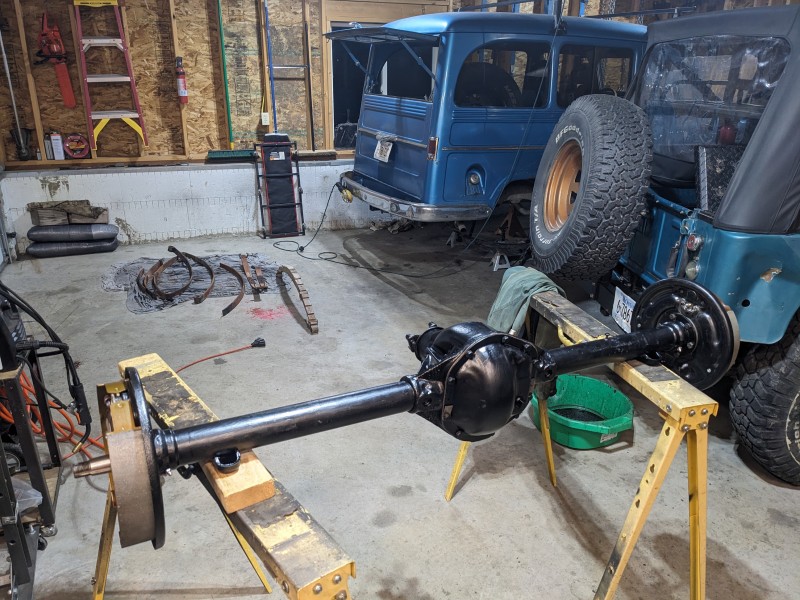
    "Are those axles considered full float?"

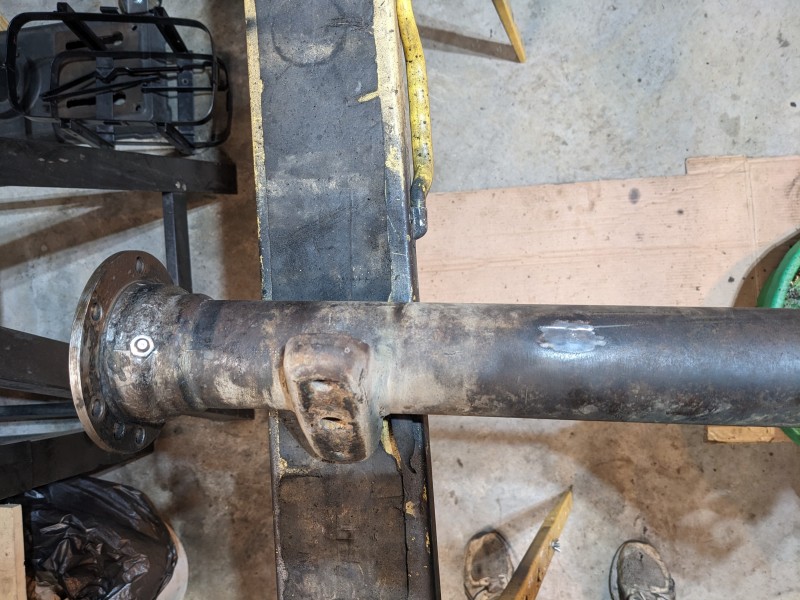
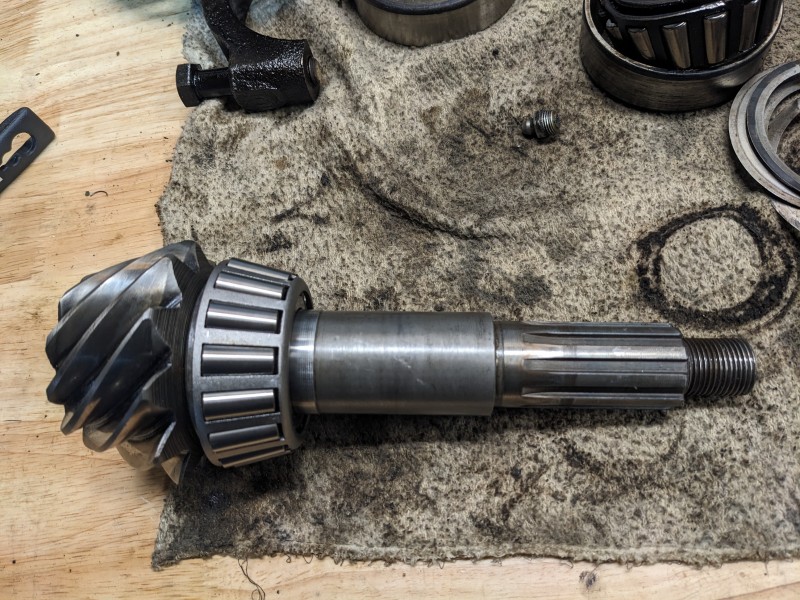
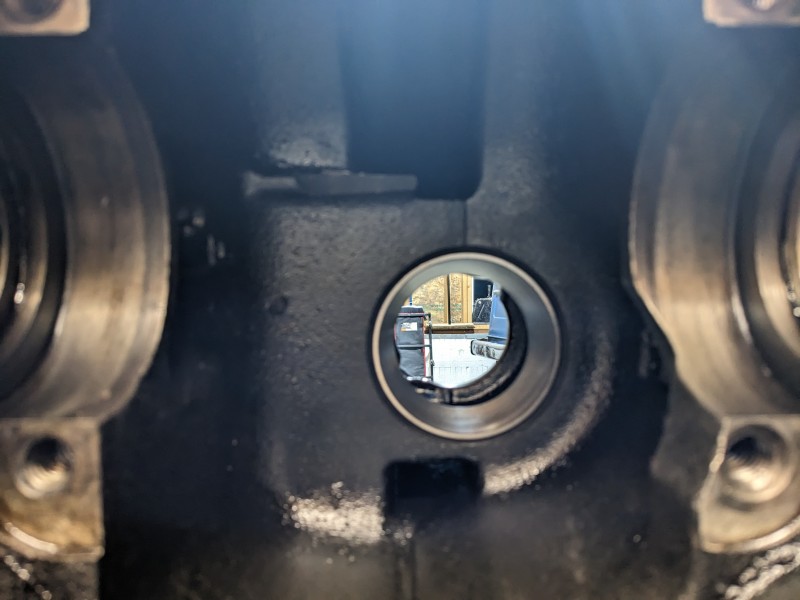
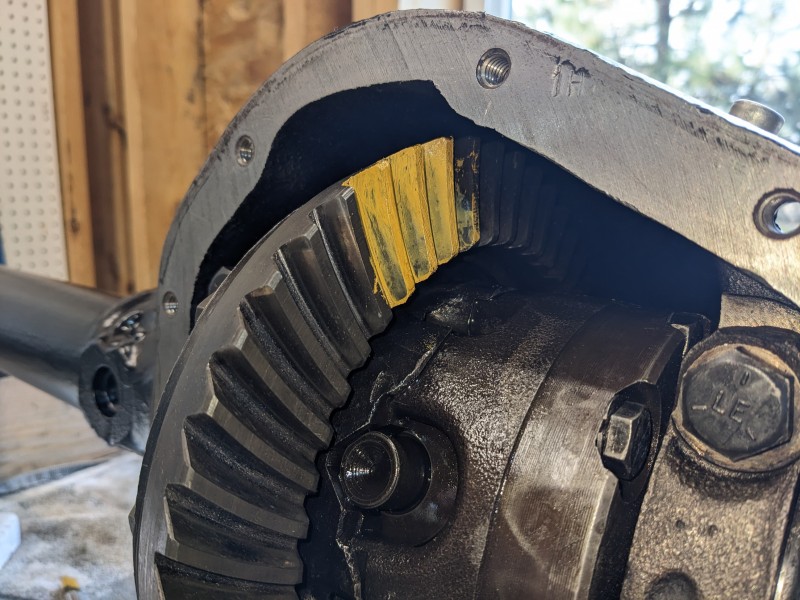
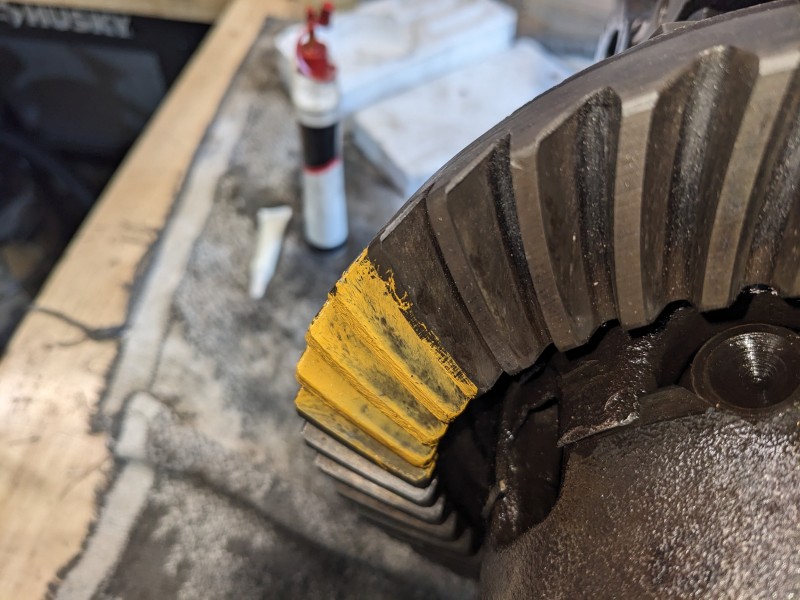
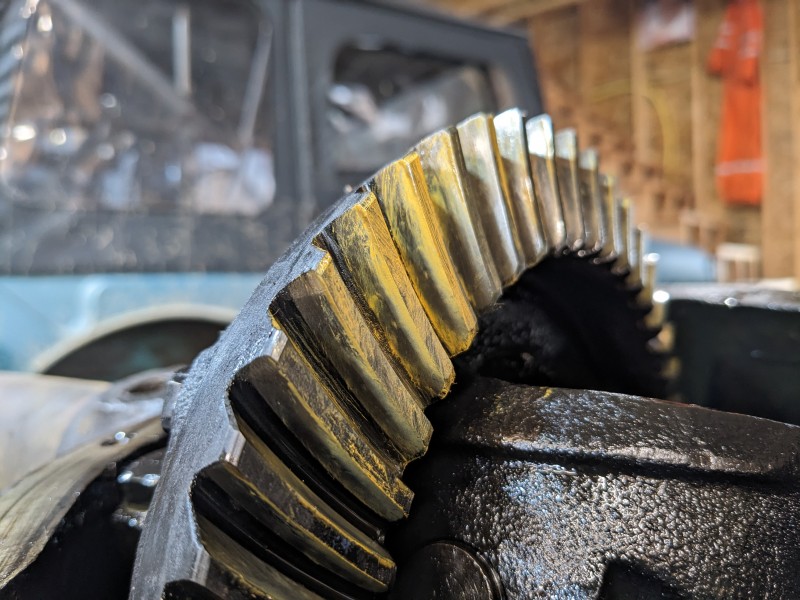
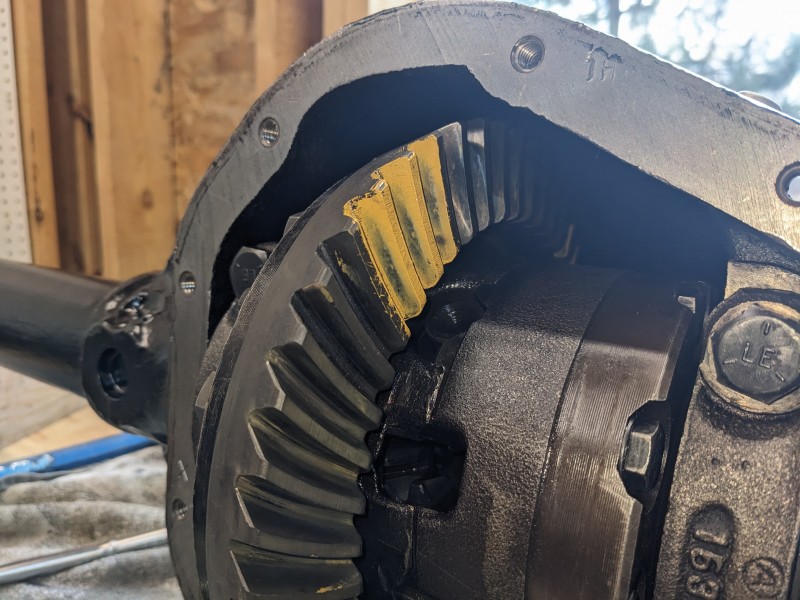
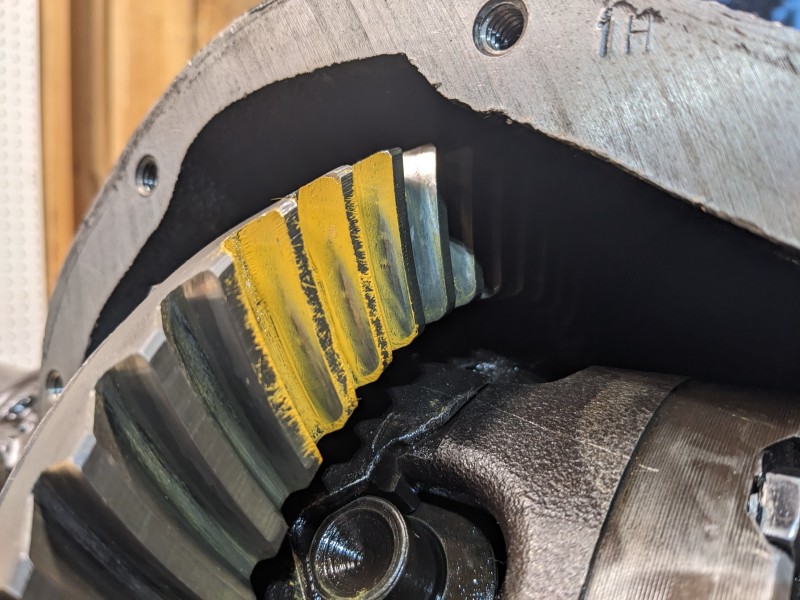
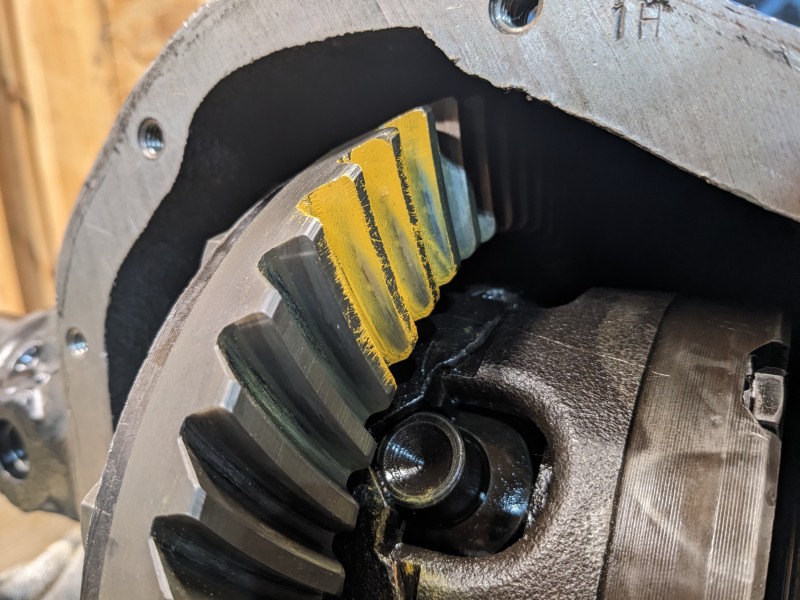
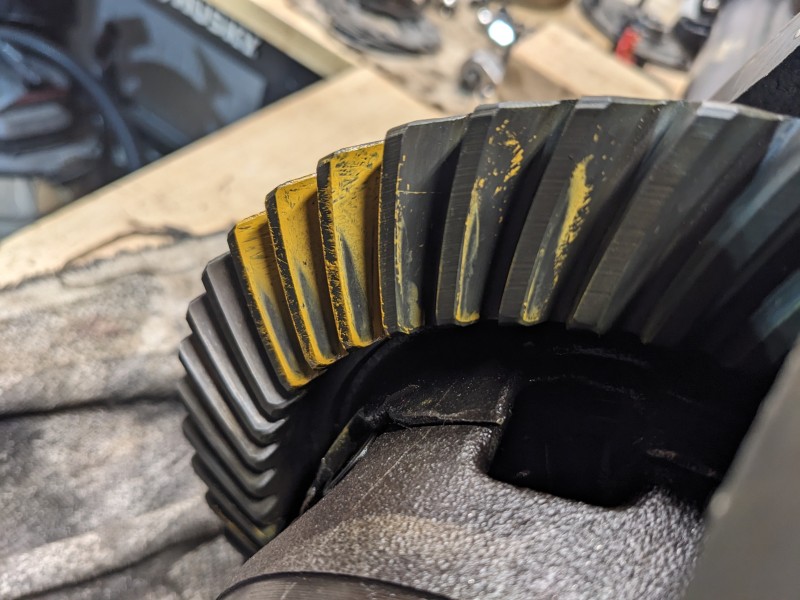
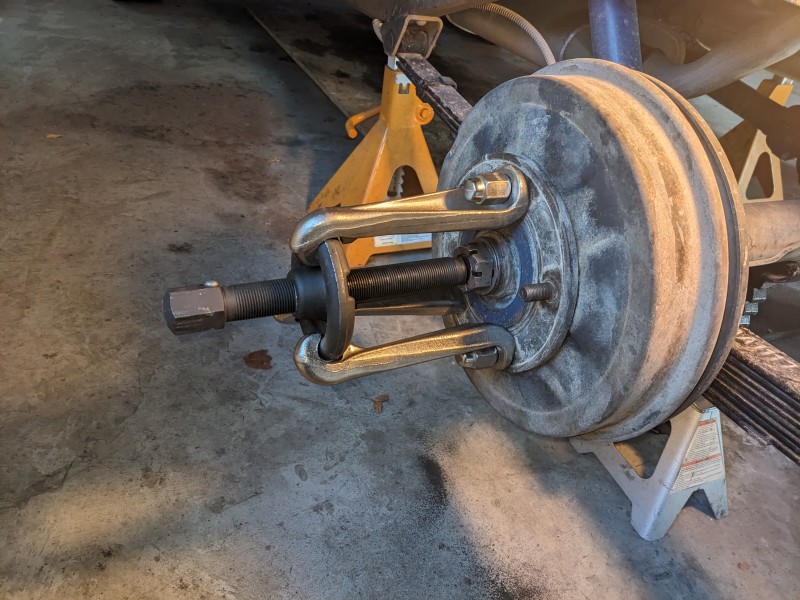
    No....these are traditional 2-piece axles where the outer end of the axle shaft rides on a bearing that is set inside the outer end of the housing. The axle connects to the hub via a machined taper press on fit and a key/keyway.....the hub/axle keyway can be weak spot in these early D44s as can the shafts. A 'full-float' set-up would have the hub riding on a bearing that rides on a dummy 'spindle' shaft that is bolted to the end of the axle housing (just like a front axle minus the axle shaft u-joint and knuckle that allows for turning). The outer end of the axle shaft would be splined and connect to the hub via a female splined drive flange or locking hub (just like the front). The full float is not necessarily stronger in terms of the axle shaft - although it necessary to get aftermarket shafts which are often inherently stronger. And the splined hub/axle connection is no stronger than the tapered keyway, but the set-up allows for the ability for the vehicle to keep rolling on all 4 if an axle shaft breaks (and with removal of the broken shaft you can drive out in front wheel drive), as its the hub that is supported on the bearing and not the axle shaft. Blow up an axle shaft on the old 2 piece set-up, and its a PITA to get the jeep to even roll (so its hard to even tow it out)....

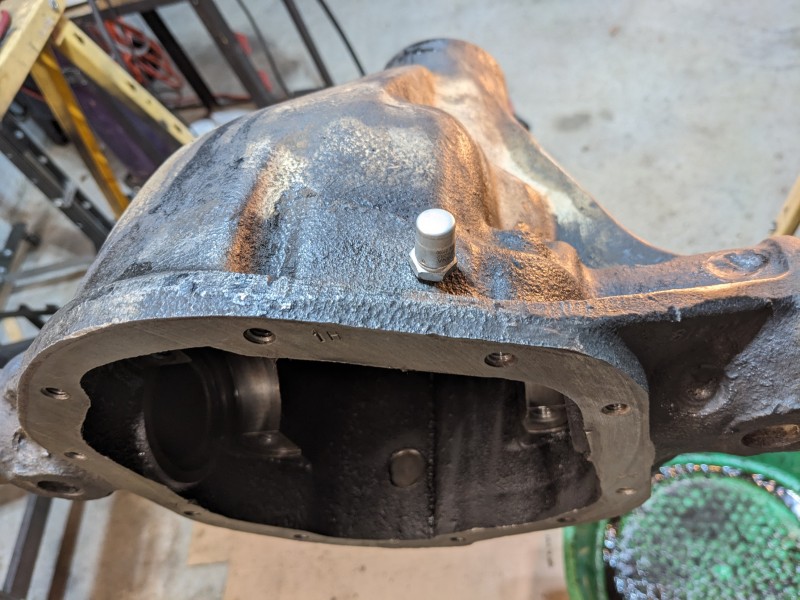
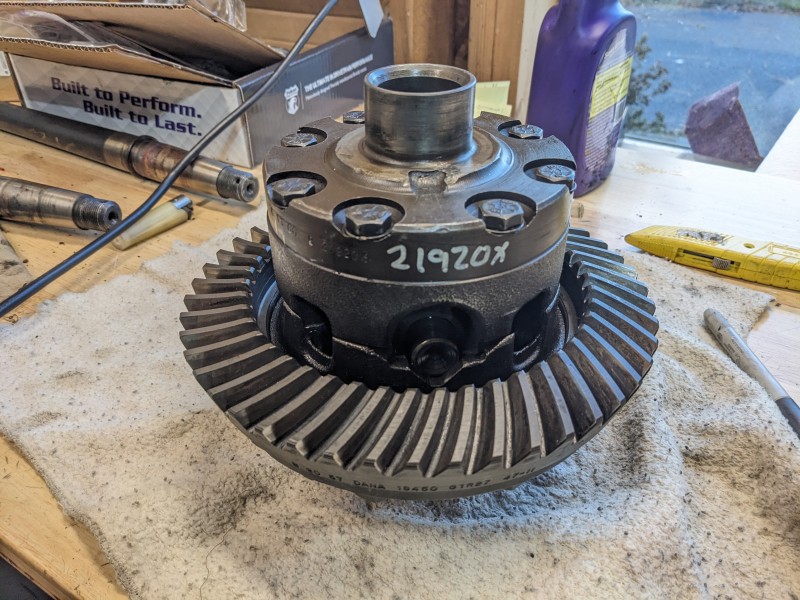
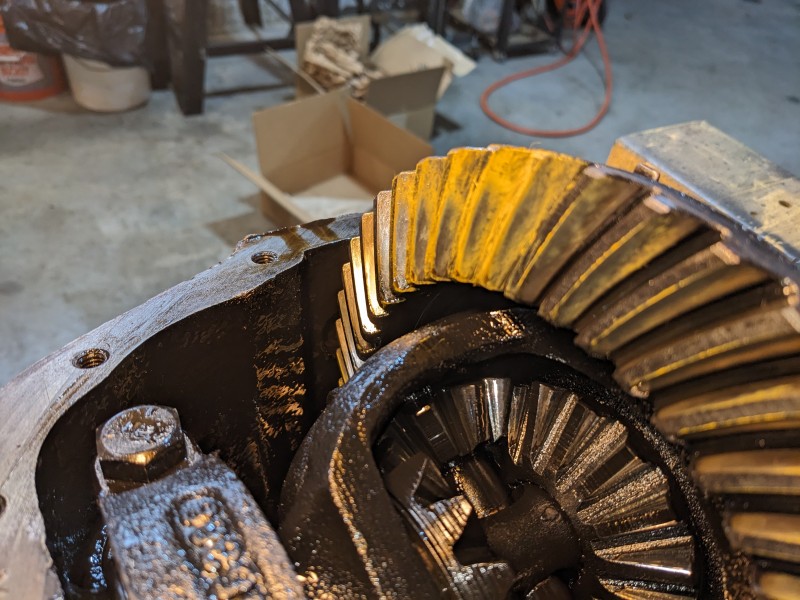
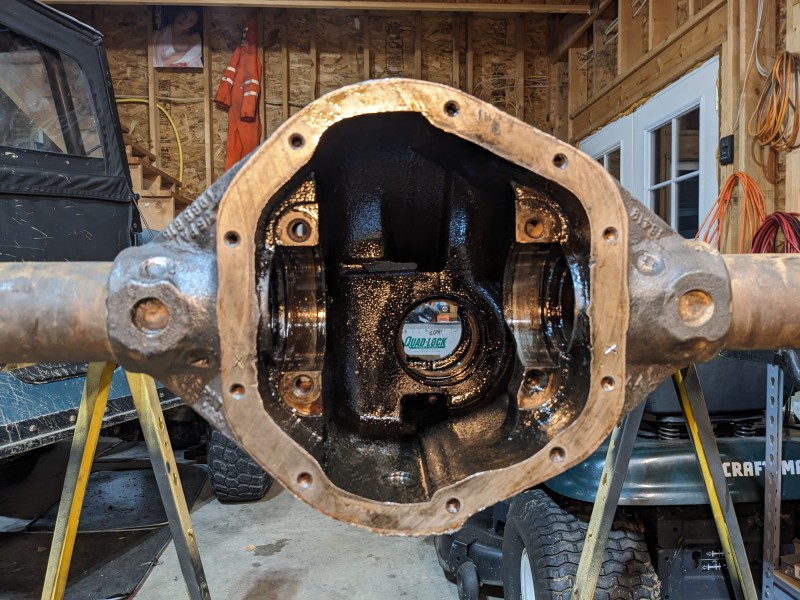
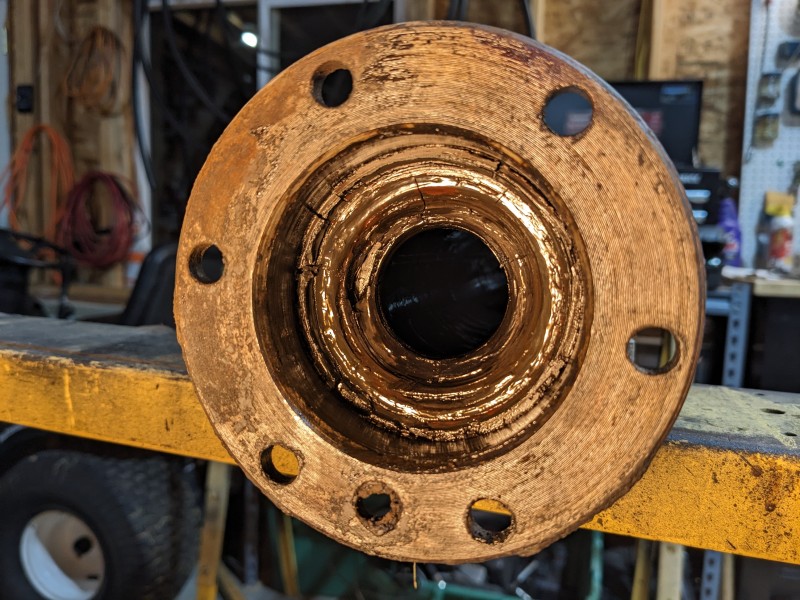
    FWIW, This is some of the same challenges you see with the later AMC era model 20 differential found in the CJ5 and 7. The model 20 has a strong R&P, but weak axle shafts with a 2 piece design (and a weak axle tube as well). The old D44 2 piece is probably a bit stronger (albeit it wasn't often run behind the more powerful engines). The big change/improvement in the D44 (at least in the CJ vintage) started around the 1970 production year (so that includes my cj5), with a 1-piece design. The axle shaft has a flanged end that is also the wheel hub - thus '1-piece'. The axle shaft was also increased in size just a bit, axle housing increased in strength just a bit etc - proved a very strong design for most all builds of the vintage era. It is still not a 'full float' design, but the increase in strength and durability of the axle makes breakage must less likely - but yes, if the axle shaft breaks, its still a pain to tow it out on all fours. The design proved solid enough that many model 20 axles were later converted through aftermarket kits to 1-piece design (most notably moser axles).
    ___________
    James Orofino
    1970 CJ5
    1958 Willys Wagon

  5. The Following Member Says Thanks to FINOCJ For This Post:

    Jim (November 18th, 2023)

  6. #344
    Join Date
    Jul 2014
    Member
    #1546
    Last Online
    42 Minutes Ago
    Location
    Bozeman, MT
    Age
    46
    4x4
    1970CJ5 1958WillysWagon
    Posts
    3,710
    User Name
    FINOCJ
    Real Name
    James Orofino
    Thanks Given
    1,278
    Thanked 1,606 Times in 976 Posts

    Default Re: 58 Willys Wagon


    Making a bit of progress on the D44 PL install etc....got the housing cleaned up enough to get new zircs installed for the wheel bearing cavity and welded up the axle tube vent:


    Got a new vent drilled, tapped and installed in the top of the housing - this is a much better location and eventually could upgrade to a threaded nipple and a hose vent extension:


    Painted the housing:


    Spent some time with the pinon....a couple of the first threads had some damage and I was having a lot of issue getting a nut to thread on...But after tracking down a big die at the local hardware store and a lot of stress with a file and a die, I got it cleaned up pretty good without making it worse and unusable (which was the stressfull part - didn't want to deal with replacing the R&P). Those threads look pretty good now....also pressed on the new inner bearing:


    Drove in the inner bearing cup with the shims behind it - just trying to copy the existing pinon depth (although I erred on the side of a thousandth or so short on the stack instead of a thousandth or so thick - so that will raise the pinon up just a smidge (ps note - this may come back to be a concern!)....
    ___________
    James Orofino
    1970 CJ5
    1958 Willys Wagon

  7. #345
    Join Date
    Jul 2014
    Member
    #1546
    Last Online
    42 Minutes Ago
    Location
    Bozeman, MT
    Age
    46
    4x4
    1970CJ5 1958WillysWagon
    Posts
    3,710
    User Name
    FINOCJ
    Real Name
    James Orofino
    Thanks Given
    1,278
    Thanked 1,606 Times in 976 Posts

    Default Re: 58 Willys Wagon


    Next was getting the pinon preload set...put in the exact .071 outer pinon shim stack and rotational torque came out just a bit too low at 10inch-lbs.....looking for something around 15in-lbs


    so drive the pinon out and pull out the thin .002 shim ---- I got it!


    I am not 100% pinon depth is spot on, so going to leave the seal and slinger etc out until I get the carrier shims set and verify good pattern. It won't be fun removing the pinon again and inner cup to change those shims if needed, but will do what needs to be done to get it right. But I matched the old inner shim pack to within .001, so it's got a good chance of working as is.

    Next was transfer the ring gear from the OEM open case to the PL case....


    I pulled the old carrier bearings using a clamshell puller - this allowed me to not damage the old bearings upon removal so i could repurpose them into 'set-up' bearings. I ground the inside diameter of the bearing out just a bit so they would 'slip-fit' on the ends of the PL case. This allows them to be easily put on and off as the shims that go under them are fine tuned. Once the shim packs are finalized (based on R&P pattern and backlash), new bearings will get pressed on.


    Now for the fun...using the thickness of the shim packs that came out, I had a starting point to try test fitting the new PL case. First attempt:
    I am trying to essentially match the existing wear pattern and maybe improve the backlash just a bit from the .010" that it had previously....
    Here is the new set-up pattern on the drive side:


    coast side:


    I think the pattern is coming out okay in terms of in terms of height between the root and crown, but seems to be too far towards the toe. Here is the old pattern again - if anything, its possibly a smidge low, but its more centered between the heel and toe:


    Based on wanting to move the pattern away from the toe and towards the heel just a bit, I need to move the ring gear away from the pinon (move some shim stack from bolt side to the tooth side). Doing this will increase backlash.....The current backlash is just over .008" and I am worried that I will end up with too much backlash.

    I moved the shims a bit toward the tooth side to push the ring gear away from the pinon....I went right up till the backlash was back at the max of .010 (and the same as where it was with the old case when it came out). It produced a ok pattern that mimics pretty close to what came out. The drive side is good - the coast side is still a bit towards the toe, but I would take it. I like the pattern - just wish I could squeeze the backlash down a bit. Guess I have to decide if its good as is, or if I should mess with pulling the pinon (which is a bit of a PITA) and trying to set it a bit higher (reduce the shim pack) - that would both move the pattern away from the toe, and more importantly, also raise the contact patch higher up the the flank? That would increase the backlash, so I'd also have to move some shims from the tooth side to the bolt side to offset that, and hopefully be able to get another few thousandths to across to reduce the backlash to something like .008.

    Overall, I don't think this pattern is all that bad considering what it started as upon removal:

    ___________
    James Orofino
    1970 CJ5
    1958 Willys Wagon

  8. #346
    Join Date
    Jul 2014
    Member
    #1546
    Last Online
    42 Minutes Ago
    Location
    Bozeman, MT
    Age
    46
    4x4
    1970CJ5 1958WillysWagon
    Posts
    3,710
    User Name
    FINOCJ
    Real Name
    James Orofino
    Thanks Given
    1,278
    Thanked 1,606 Times in 976 Posts

    Default Re: 58 Willys Wagon


    Decided to fight it a bit more and see if I can get it better....Tore it all apart again, removed a .010 shim from the inner pinon stack (from .030 to .020)....As expected, the backlash increased so I had to move some of the shim stack from the tooth side to the bolt side...Here is the best result I found with the new pinon position and a backlash of .008 (I had trouble finding a backlash of .010 or so, it seems to jump to .012 and beyond very quickly).
    Drive side is not horrible - it definitely further away from the toe, but I think its a bit too high up the tooth...


    the coast side is not very good - its high and toe:


    Decided the .010 reduction was too much, so I added back .004 and checked pattern, then another .002, and finally, another .002 for a total reduction from starting point of only .002. This puts me around a total shim thickness of .028. The drive side is starting to look pretty good - its nicely centered between the root and top. Its a still a bit towards the toe, but that is less important (FWIW - BL is .006):


    I think one of the reasons its tempting to run the pinon even close to the ring gear centerline is the coast side...this image is not the best and kind of over emphasize the issue, but its still pretty high and towards the toe. I looked at some ghost patterns and they do look better - though not as good as the deeper position I did very first and which was similar to what it came out with.


    So if going only off the drive side, I like this set up...if taking the coast side into consideration, not sure where the best compromise is. As i said, the ghost pattern seems to indicate its not as bad as the above photo, and maybe with a bit of usage, it will 'wear-in' a bit more and a larger, more centered contact patch will develop. Its also possible that increasing the backlash just a bit from .006 to .008 or so would help - and maybe would be a better target given the used gear set? Or I just go back to what I finished with yesterday and call it good - i am not seemingly getting anything that is markedly better that I can tell.
    ___________
    James Orofino
    1970 CJ5
    1958 Willys Wagon

  9. #347
    Join Date
    Jul 2014
    Member
    #1546
    Last Online
    42 Minutes Ago
    Location
    Bozeman, MT
    Age
    46
    4x4
    1970CJ5 1958WillysWagon
    Posts
    3,710
    User Name
    FINOCJ
    Real Name
    James Orofino
    Thanks Given
    1,278
    Thanked 1,606 Times in 976 Posts

    Default Re: 58 Willys Wagon


    Well, its getting close....buttoned up the carrier yesterday with the limited slip power lock case, and finished up the axle install and new upgraded 11" drum brakes - upgrade because these are self adjusting style instead of the OEM manual adjusting style. And hopefully the parking brake will work better.....


    You can see in the background some leaf springs that I found cheap that I think are old Rancho 1" lift springs for a willys wagon! They are a bit crusty, so disassembled and need to clean them up a bit and put them back together. I got all 4, but just working on the rears for now. The spring pack is only 4 leaves, but they are THICK leaves - one reason to believe they are Ranchos. Anyway, they will probably ride STIFF, but given their age and use, and some cleaning and lubrification, they might work just fine. I could use a bit more clearance on the rear. If they are too much lift or too stiff, i can maybe merge a couple of the thick leaves into my old OEM soft springs and find a happy medium.
    ___________
    James Orofino
    1970 CJ5
    1958 Willys Wagon

  10. The Following Member Says Thanks to FINOCJ For This Post:

    Jim (November 23rd, 2023)

  11. #348
    Join Date
    Sep 2011
    Member
    #921
    Last Online
    4 Hours Ago
    Location
    Fort Collins
    4x4
    1990 Jeep Wrangler (YJ)
    Posts
    10,106
    User Name
    Jim
    Real Name
    Jim Williamson
    Thanks Given
    2,496
    Thanked 3,036 Times in 2,018 Posts

    Default Re: 58 Willys Wagon


    Congrats on getting the diff adjusted/assembled!

  12. The Following Member Says Thanks to Jim For This Post:

    FINOCJ (November 23rd, 2023)

Page 18 of 18 FirstFirst ... 15161718

Similar Threads

  1. BIG WILLYS
    By Spieg in forum Cool Finds
    Replies: 3
    Last Post: June 29th, 2019, 09:23 PM
  2. 1960 Willys Wagon
    By FINOCJ in forum Cool Finds
    Replies: 9
    Last Post: June 10th, 2019, 12:10 PM
  3. 55 Willys Wagon
    By FINOCJ in forum Cool Finds
    Replies: 1
    Last Post: May 9th, 2018, 06:43 PM
  4. Willys FC Project
    By Getaklu in forum Cool Finds
    Replies: 1
    Last Post: February 13th, 2018, 04:09 PM
  5. 1962 Willys Wagon with a twist
    By Goofy in forum Cool Finds
    Replies: 5
    Last Post: December 30th, 2015, 11:40 PM

Posting Permissions

  • You may not post new threads
  • You may not post replies
  • You may not post attachments
  • You may not edit your posts
  •  
BACK TO TOP