Plenty of room - it comes off the front top of the intake manifold right between the v8 cylinder banks - nothing else in the area....just need to investigate the o-ring vs gasket sealing methods and what is interchangeable.


Plenty of room - it comes off the front top of the intake manifold right between the v8 cylinder banks - nothing else in the area....just need to investigate the o-ring vs gasket sealing methods and what is interchangeable.
___________
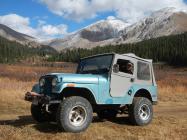
James Orofino
1970 CJ5
1958 Willys Wagon


Various sizes to splice into a water hose:
https://www.glowshiftdirect.com/water-temperature-adapters/
Would allow you to get the sensor off of the block and closer to the radiator... not sure if that's really all that necessary but its something a little different. Trade-off would be that it adds two hose clamped connections compared to your thermostat spacer.
FINOCJ (June 2nd, 2020)
___________
James Orofino
1970 CJ5
1958 Willys Wagon


sorry, not my meaning. Will it work / fit by having the sending unit sticking out that close to the block and other stuff in the area.
___________
James Orofino
1970 CJ5
1958 Willys Wagon
I've got a 46mm one in a box of van parts that's yet to be installed. The threaded port is 1/8"NPT. Just checked it with a fitting. If its not your sendor's thread that should still be easy to adapt to. Even if it's not I suspect your fan came with a bimetal temp switch. If so, they're easy to spec and should not have an issue like an analog sensor could.... but I agree using the switch you have is the best option.
Also... there's plenty of room to drill it out and tap it 1/4NPT or any other common fitting.
the temp sensor is 3/8NPT....there are a few different ways to hopefully solve this problem. I wish we had old school speed shop where you could see stuff in person. I hate having to figure it all out online and then order online and if it doesn't work or isn't what I expected, send it back etc...The process seems painfully arduous and slow unless you know exactly what you want....plus some good ol counter help would be nice as well.
___________
James Orofino
1970 CJ5
1958 Willys Wagon
Wondering if I could improve the belt drive system a bit as I am concerned about driving the water pump as is (although that is probably how its been for a long time). With the current PO set-up, a single belt around the crank drives all three additional pulleys (water pump, PS, Alt). Sorry for the low quality sketches, but they give a good idea of what I am talking about, and whether I should switch to a 2 belt system.
My main concern with the current set-up is the limited amount of belt-pulley interface on the water pump. I am thinking of switching the WP to a 2 groove pulley and utilizing the existing 2 groove pulley on the PS pump and running that as a separate belt system. That would leave the alternator to work on the original main pulley groove and wrap the the belt much closer to 90 degrees around the water pump. Worth getting a new 2 groove pulley for the WP to do this?
___________
James Orofino
1970 CJ5
1958 Willys Wagon
If you're going multi-V pulleys, could you easily run two belts to power the water pump?
don't have a 2 groove pulley at the crank...and not sure how difficult that is to replace with the harmonic balancer et al.
___________
James Orofino
1970 CJ5
1958 Willys Wagon
I also just realized that the PS pump mount is fixed - it has no adjustment for belt tension, so running that on a separate belt is probably out.
___________
James Orofino
1970 CJ5
1958 Willys Wagon
I might have a 3/8-18 NPT tap at work. Having one of these adapters in hand, it does have plenty of meat to drill and thread a new hole into the aluminum. I would need the sensor along with your adapter to make sure the hole was tapped to the correct depth with the taper and all. If you're interested, let me know.
What about a flat idler pulley pushing into the back of the belt somewhere to add tension? You'd have to make another bracket with an adjuster, but based on your alternator bracket it seems like you've got what you need to make that happen. A flapwheel and some spraypaint and it would look just fine.
FINOCJ (June 2nd, 2020)
I'll definitely let you know if I go that route....going to order some pieces tonight and we'll see where it leads.
___________
James Orofino
1970 CJ5
1958 Willys Wagon


??? SERP belt ????
___________
In a never ending search for the proper mix of dirt & rock !
Started the electric fan install...here is test mount using 4 straps around the sides to hold it in place...Once finalized in place and tightened down with proper hardware etc, its very solid. I was thinking a 5th strap over the top to the flat front panel behind the top of the grille could be helpful with supporting directly against its weight - but it would certainly look a bit shabby (like that matters given my other work on this thing), and at this point not sure it needs it.
Mounted the relay for the electric fan on the inner fender and roughed in the wiring...after testing, if all is good, it'll get cleaned up a bit and taped etc...I am also going to put a junction post on the lower inner fender for +12V that will tie the battery and alternator together and provide a good take off point for high current needs on a relay (such as the fan). Am also putting in a junction post on the inside of the firewall for keyed +12V to switch relays, power the tachometer and eventually a voltmeter and whatever else might be needed. In the short term, keeping the OEM set-up with aftermarket 60A ammeter (from PO) to go with the 60A alternator I just installed. At some point, I would hope to finalize the general wiring like I did the cj5, with a couple of fuse boxes and volt meter set-up etc.
For the temperature sending unit for the fan relay - I went with a spacer under the thermostat housing that has 2 threaded ports - used one for the sending unit and plugged the other one. Okay, I might have done this wrong, but better to know now and fix it than have it cause an issue - I left the thermostat mounted in the intake manifold in the little groove, and put the spacer on top (with the o-ring down). Then I put the housing on top of the spacer with RTV (didn't have a spare gasket). I put just a touch of thread sealant on the first couple threads of the sending unit, but didn't want to use too much and cause any issue with the sending unit not grounding properly.
As I had to dig around under the dash to find the keyed 12V wire from ignition, I also did some wiring clean-up and got some of the speedo cluster gauges working. Got all of the interior dash and auxiliary gauge lights wired to the correct headlight switch terminal so they come on with the parking lights. Replaced some of the bulbs, so the general backlight on the speedo is working, and also got the Amp light wired in and working! (I stole the 2-wire oil light socket as I am not using it - separate mechanical oil pressure gague). Hoping to get the Hi-beam indicator working - it has a new bulb and wired in, but I think I popped a fuse, or tripped the circuit breaker at some point - so lost the headlight functionality (forgot to disconnect the battery at some point in my many back and forth's testing things, and sparked the headlight switch with a screw driver). I think there is a circuit breaker on the back of the headlight switch that should reset? maybe there is also an inline fuse somewhere? I am not using the speedo temp gauge - but both the fuel and temp test like they will work, so at some point I'll have to drop the tank to see what is going on with the fuel sending unit.

___________
James Orofino
1970 CJ5
1958 Willys Wagon
Nice work!
Thanks for the temp sensor adapter pic - I was thinking it was on the front of the motor. What temp does the elect fan turn on / off? What temp thermostat are you running?
Another small step - got the high beam switch and indicator light working.
When I got it, the headlights came on when the switch was pulled out, but not sure the high beams were coming on or not. I think the lights flickered when the dimmer switch was pushed, but not sure anything was actually changing. Based on how it was wired - I think it was just using a side terminal post as a junction block and connecting the wire from the headlight switch directly to the low beams. The high beam wire was on the center terminal (?) and the dash indicator was on the 3rd terminal and no bulb. I am not all that jeep or wiring savvy, but it doesn't seem that hard to get it right.
Green wire from headlight switch to the center post, wire to low beams to one side post (right in the case), and wire to high beam to the opposite side post along with the dash indicator light to the high beam post. Pretty easy to check the switch functionality with a multi-meter to see which circuits closed when. Headlight relay may be in the future, but one thing at a time for now just to get it back to working - and probably some new wires from the fender junction block to the lights etc.
Might be time to start it and test everything out a bit....
___________
James Orofino
1970 CJ5
1958 Willys Wagon
___________
James Orofino
1970 CJ5
1958 Willys Wagon
FINOCJ (June 12th, 2020)
Well...kinda of hopeful...its nearing 90 here and cruised around my area of town a bit...sat in traffic and red lights etc, cruised on the hwy a little bit, let it idle for awhile in the driveway, cruised around a bit more....maybe, just maybe this might be the solution....FWIW, I don't think the fan ever turned off once it kick-ed on. Fortunately, the 10SI alternator puts out decent current even at low rpm (idle), so it should be able to keep up most of the current needs much better than the old style generator that is very rpm dependent. The amp gauge does drift slightly negative suggesting the alternator isn't quite enough and needs a bit of battery current - and that would probably be more so if the headlights were on. I could bump the idle speed up just a tad to help a bit with alternator output. I am really liking the AGM battery that I put in the cj5 last summer, so that would also be an option for this considering it may go through a lot of discharge, charge cycles (albeit not deep cycling like a winch pull etc).
___________
James Orofino
1970 CJ5
1958 Willys Wagon
 Posting Permissions

 Reply W/Quote


