woo hoo
Nice looking Jeep, but what are we supposed to be looking at for the Mod For The Day? Tires, paint, bumpers, fog lights??


woo hoo
Nice looking Jeep, but what are we supposed to be looking at for the Mod For The Day? Tires, paint, bumpers, fog lights??

Finally finished my new front bumper and winch,
http://www.frontrange4x4.com/forums/...511#post127511
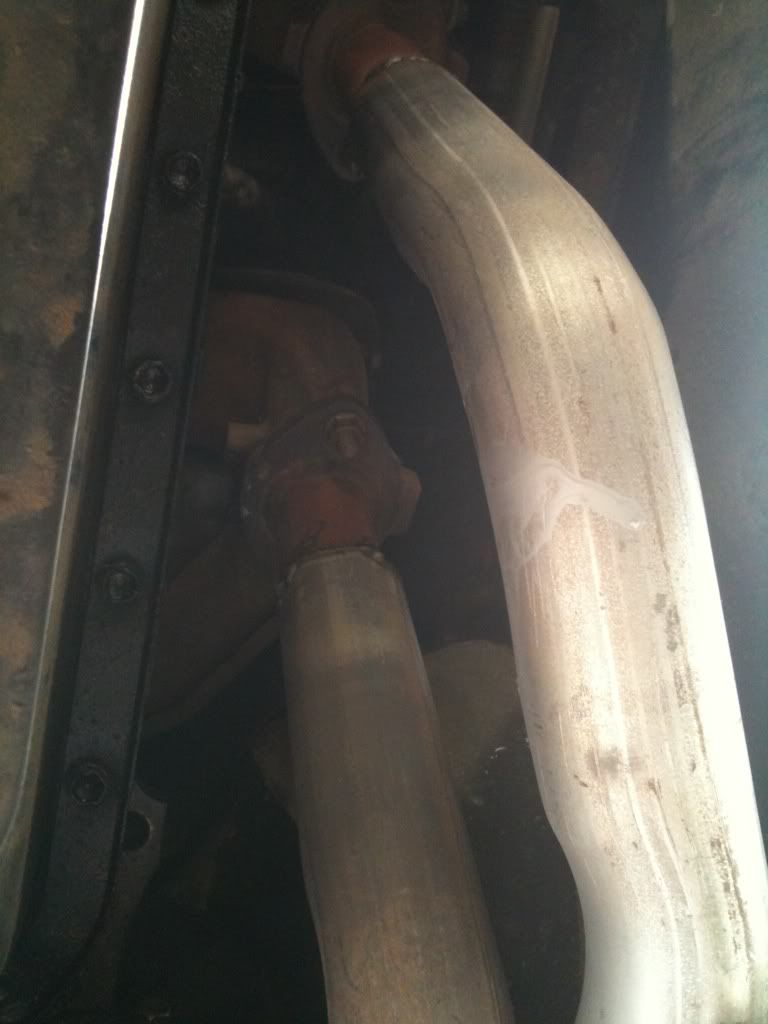
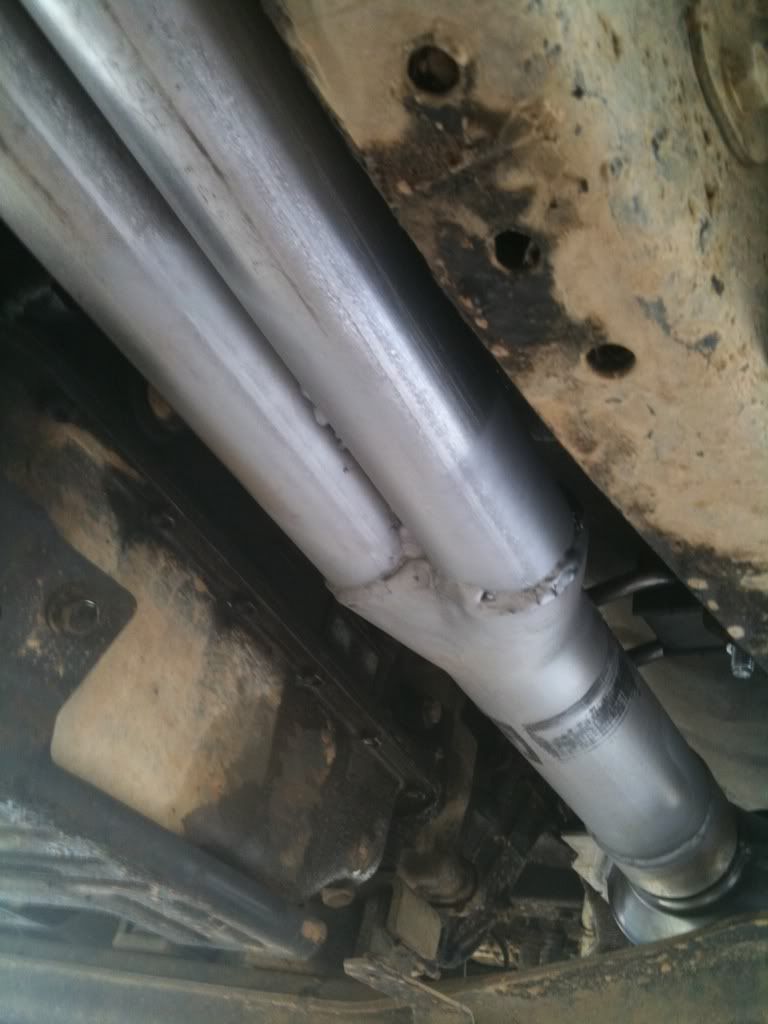
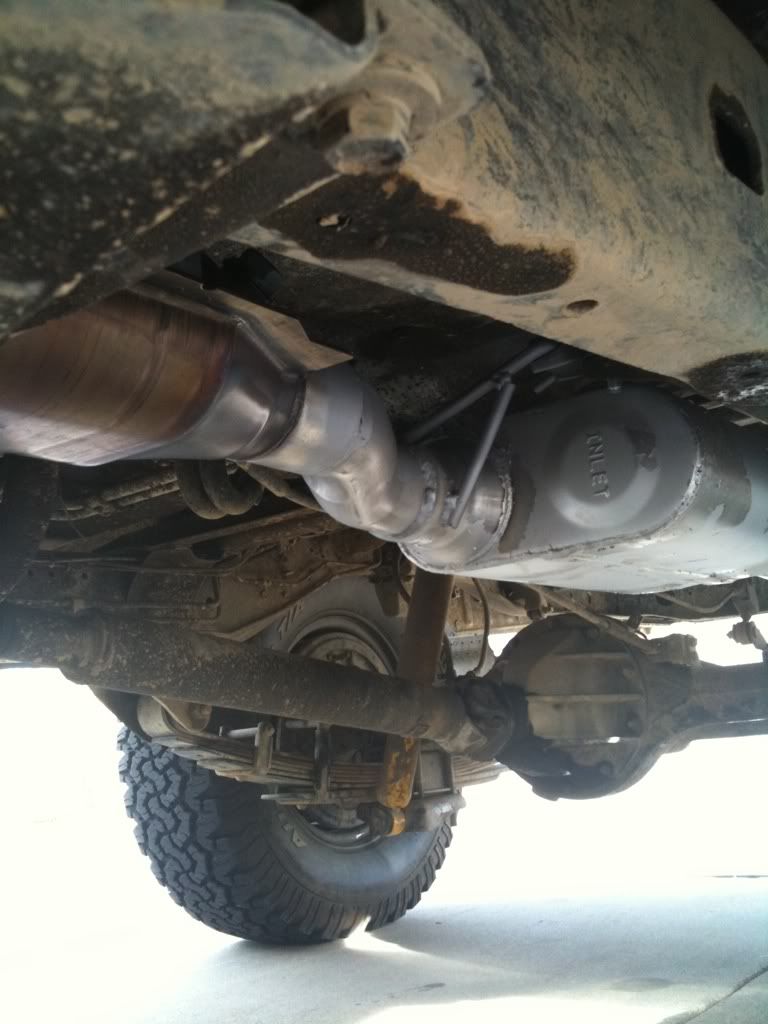
New exhaust courtesy of Scott and the guys at AA Performance
Nothing under the frame rail (except like .25" at the exhaust tip) and it sounds much better. Plus I gained a little more top end power.


Very nice Matt, Scotty does great work!
___________
Chris in Florida

The wheels look great, Gary. I plan o do the same this winter. After our run Saturday I plan to throw the stock steels back on and paint the Rubi wheels, as an added bonus, no MT's in the snow so I should be able to survive for some spring wheelin.
Both the wheels and the exhaust look great, guys!
I have always wondered, every time I look under an older LC, just what the Yota folks were thinking when the got around to the exhaust. It always looked to me like a "Oh crap! We forgot the exhaust stuff!" kinda thing...
___________
Chris in Florida

Mod for the day... this is a big one.... ready??
I replaced a bolt that fell out of my exhaust connection at the manifold.
The rest of my time was tracking down a weird knocking sound in the cab... finally found it.. and have no idea how I am going to fix it. Turns out it is a piece of the floor board popping in and out as the rig moves slightly. i think the big hammer might come out tomorrow.
If the floorboard is dimpled or has the raised portions on it, you maybe able to do something as simple as riveting some flat stock between the raised sections to stiffen it up. Good job ion finding the noise. Sometimes those aren't easy to find as sound transmits all over the damn place.
yea, unfortunately its is right on top of (and probably because of) my homemade body mount underneither. The floor is popping agains a piece of 1/4" bar stock. I was thinking I would smack it with the hammer and see if that just pops the dent out permanently.. and if not, then at least get the metal close enough to the bar underneith to just weld it together . The bar is on top of the shock part of the body mount and is already welded to the floorboard in places, just not that place.
You could always cheap a bit there and shoot some of that triple expanding foam into the gap....Stuff is evil, works, lasts forever (I filled my fenders where they are closest to the doors on my heap with it 6 years ago), and costs too much. Hilti has a reusable kind that I have used at Lowe's, but it doesn't quite live up to it's reusable advertising.
Here is another mod i just did. this mod was more about finally finishing a previous job and cleaning up the cab a little. i took the ash tray out when i first installed the ARB's, swithces, and compresor. the only place i could find to put the compressor switch was in the ash tray. i didnt really wanna cut the dash any more around the locker swithces and still wanted to keep the compressor switch close. its nice to finally have this switch mounted, instead of dangling around just hanging there like it has been for about a year and a half.
all i did was take a leftover piece of 16ga. and measure out and drill the screw holes. then drew out the switch hole from template i had made for the locker switches in the dash.
oh.... and OWNAGE for my 100th post
did not like all the useless parts to keep my rig quiet ! how dose it go " loud intakes save lifes" ?? look good, sounds good, and did not cost me a penny. reused parts and added new hoses and lots left over. its cleaner looking, and 100 less places to have an vacum leak.

did this about 3 weeks ago. out ith the old and in with the older ! the stock grill did not fit very well after this truck was filpped and rolled off the high way. so i put a grill i got about 4 years ago when i when vintage toyota parts crazy. its from a 70's toyota carolla. the round head lights and head light buckets came from a VW bug unknown year (60's-70's). allso cut the extra sheet metal on the lower front corners. and wraped the front of the frenders for a more round look. i think the grill cost me 20 $ (pull n save) the head lights each were 4$ ( u pull n pay) and the head light buckest were 5 $ each. not bad for 38 bucks i must say !
better then the zip ties i had holding my last grill. and head lights ! HAHAHA
Meh! I used that stuff to fill my fender wells after trimming. Yeah, it may hasten rust but we have so little moisture that I doubt it'll cause much trouble for you. Now the guy that bought my truck and moved it to Iowa may find a different result!
___________
Chris in Florida
spray foam it is. Hopefully I can get it in there though, Its a really small crack to get stuff in.
Drill a hole the size of the nozzle/tube.
___________
Chris in Florida
all of this happend about 3 weeks ago. ( had no time to post).... the last pic is what it looked like 6 weeks ago. it was on bald 31's, wood flat bed, busted window. now its on new 33's bgf's, with a truck bed, glass, and a 2 inch home made body lift. got the tires by tradeing, glass was 20$, bed was 180$ and body lift cost about 40 bucks to make. big washers tubing and grade 8 bolts nuts and washers.. once more not bad for 240 Bucks $$
body lift was not to bad. i luckly had a fork lift to help with the bed. and glass was the hard part..... <<< i kidd i kid !
looks waaaaaaaay better and works better too..
 Posting Permissions

 Reply W/Quote