Looks good sir. You will be pleased when you get it done


Looks good sir. You will be pleased when you get it done
___________
Crazy- You call me crazy, but you wouldn't know crazy if Charles Manson was eating Fruit Loops on your front porch. Suiciadl tendancies- intatutionalized
FINOCJ (April 7th, 2019)


Going to work on mounting the new ring gear and some pinon stuff, but a friend has been working on a similar jeep axle and is using the same bearing kit I am.
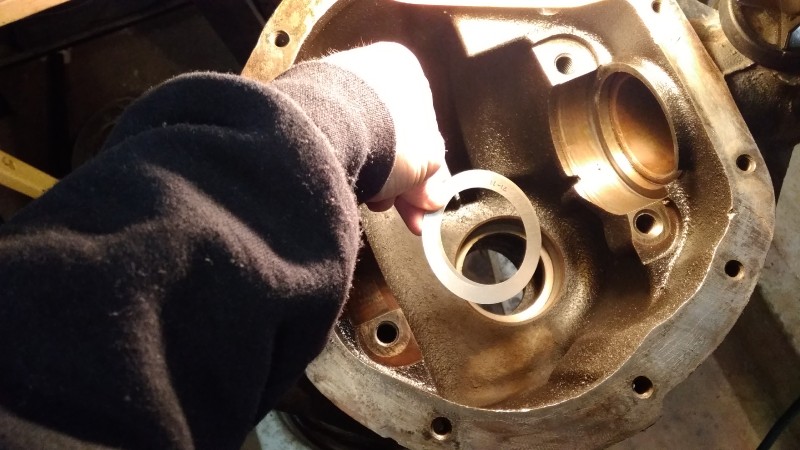
He gave me the heads up that there might be some issue with the new carrier bearing shims (from Richmond gear) fitting properly on the case. Thanks to his heads up, I found this issue:
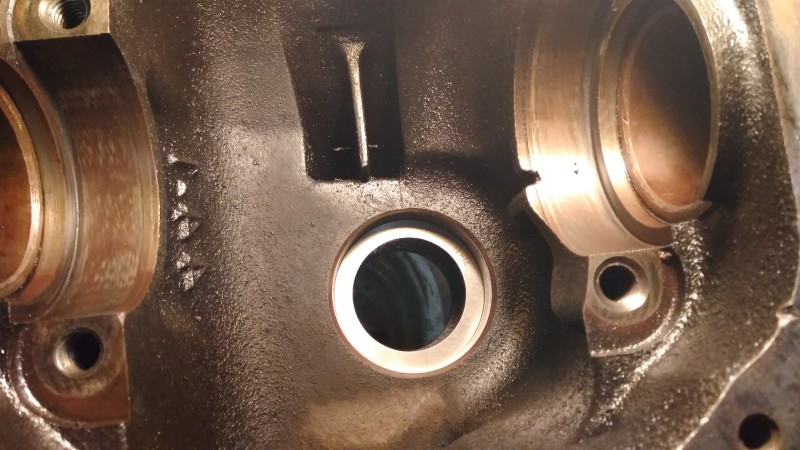
The new shims do not sit all the way down on to the case (this is the oem trac lok case):
And since for me its more important that it fits on the new eaton locker case - better but not perfect:
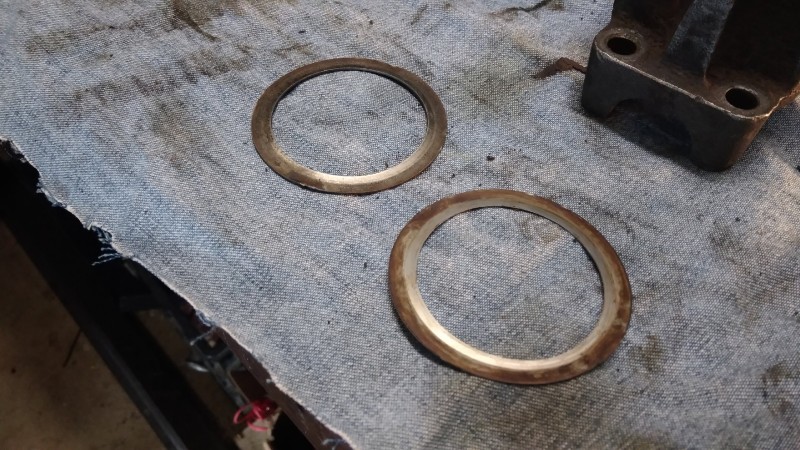
I went and and compared the new shims to the old shims - inner diameter is the same. And the old shims fit pretty nicely at first glance:
Upon closer look, the old shims have a crease or fold in them that allows for them to conform to the radius curve. I don't know if that is original or if someone just forced flat shims with too small an ID down over that radius curve and they bent to fit? You can see the crease better in the upper one...need to find shims with slightly larger ID. I think I will start with contacting Richmond gear and see what they say, and I can also contact JEGS which is where I bought the Richmond kit from.
___________
James Orofino
1970 CJ5
1958 Willys Wagon
I did get the ring gear on to the new Eaton case for some test fitting...Still need to finalize these with red loc-tite.
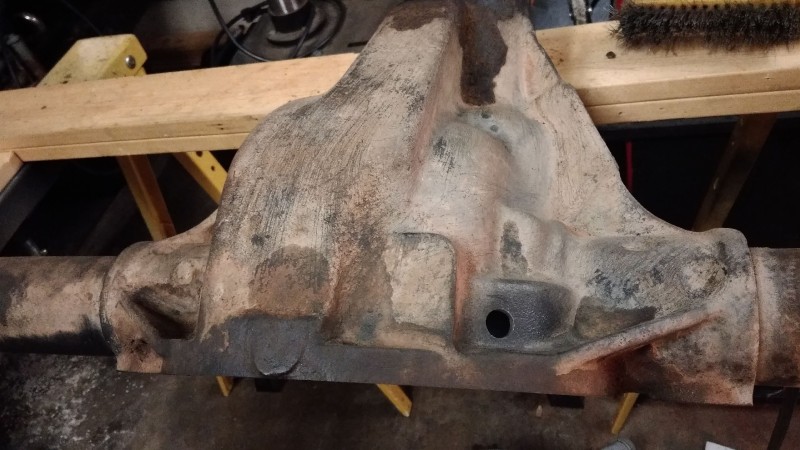
Also located and drilled the 1/2" hole in the top passenger side of the case where the electrical wiring will go.
___________
James Orofino
1970 CJ5
1958 Willys Wagon

Looks great, and good idea changing so much while you're already there.Are you going to paint the axle too?
FINOCJ (April 8th, 2019)


What's the verdict on the radius'd shims?
I'll second the nudge for some axle black.
The finishing touch to a job well done
(says the guy with the driver's side windshield hinge that's rusty - bother's me but I guess just not enough).
Been at jury duty for the last couple days...probably 3 more to go. Been trying to keep my regular job taken care of at night. But making a bit of progress:
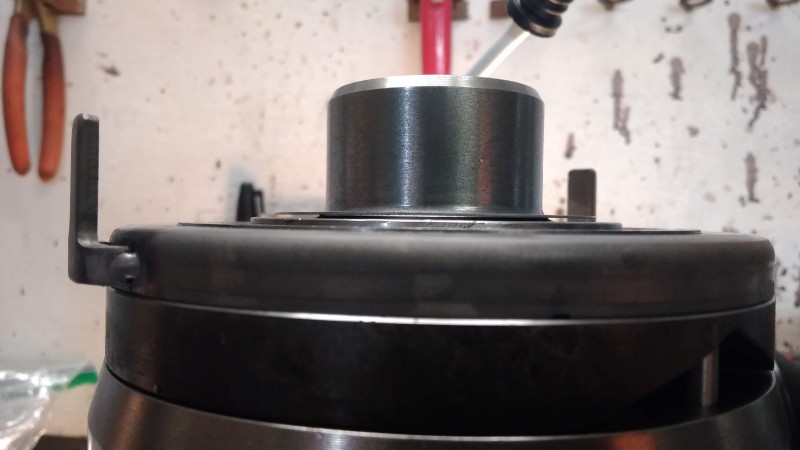
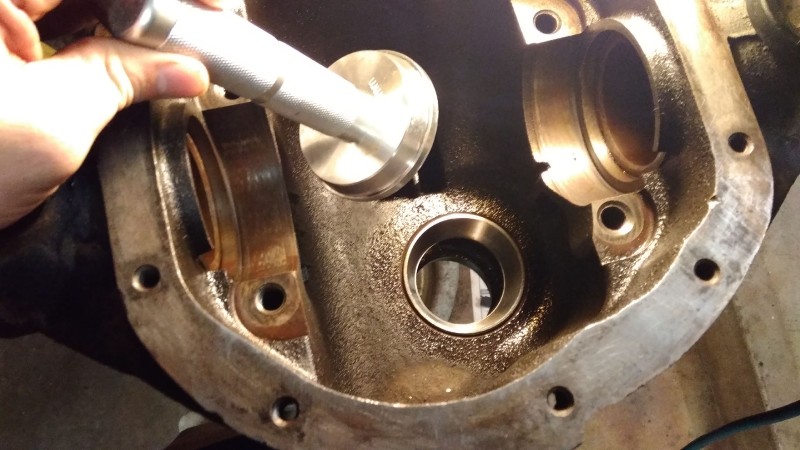
Put the new replacement pinon depth shims in that go under the inner pinon bearing - I tried to match the previous .025" shim pack:
Then drove in the bearing cup...I put the cup in the freezer, but never seems to help much.
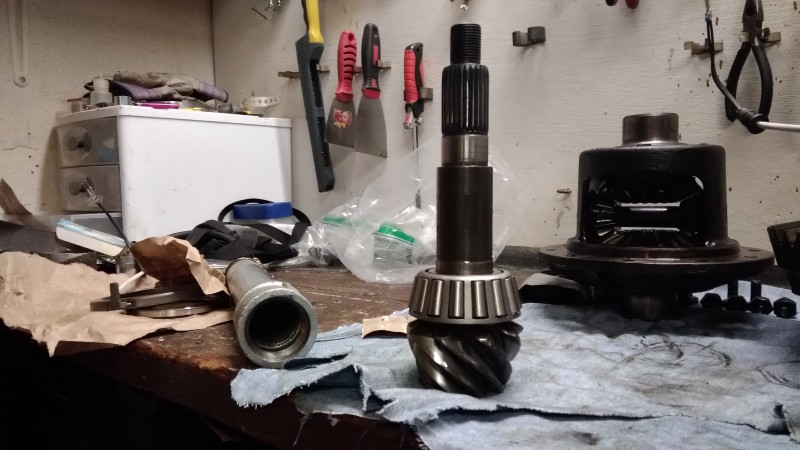
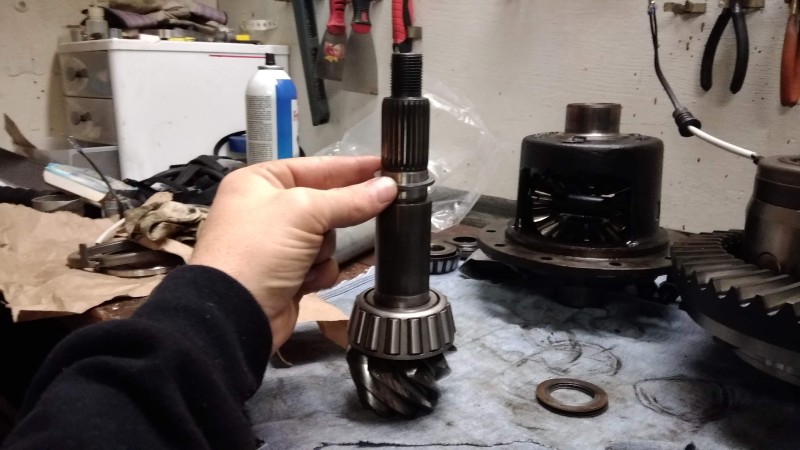
I the got the lower pinon bearing on the pinon gear shaft...I put the pinon gear shaft in the freezer and heated the bearing up in our mini toaster oven...dropped right on!
Now its time to put the pinon gear in and test for rotational torque and the appropriate amount of pre-load spacers:
For the first attempt, I am trying to replicate the .070" pack that was in there previously with a .072" pack (closest I could get with what was included)
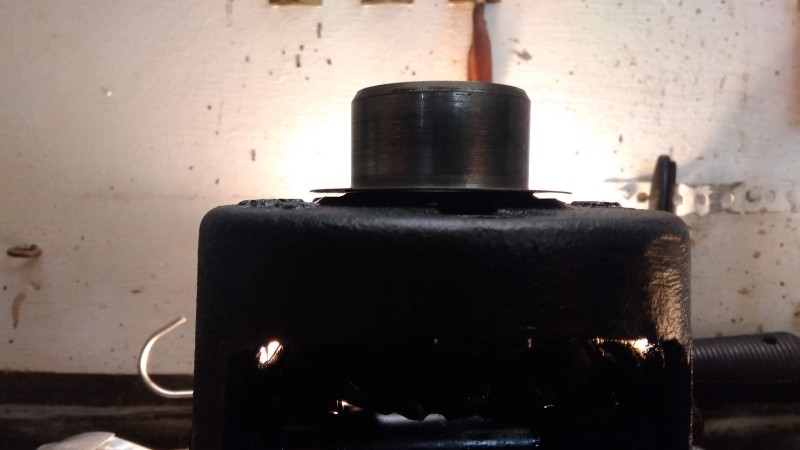
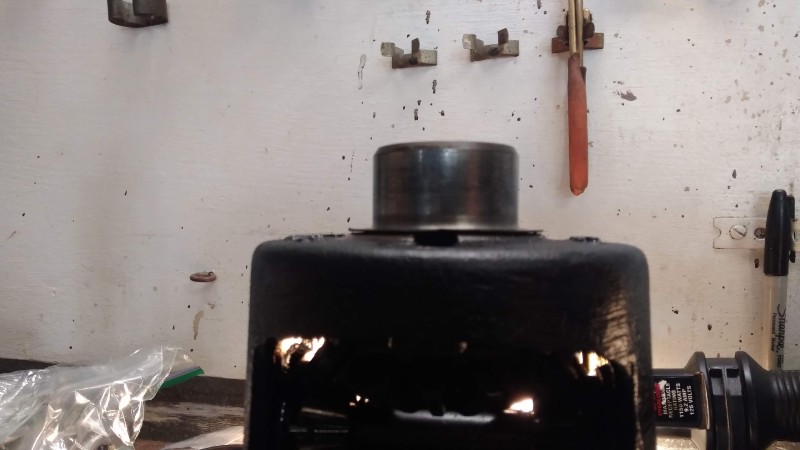
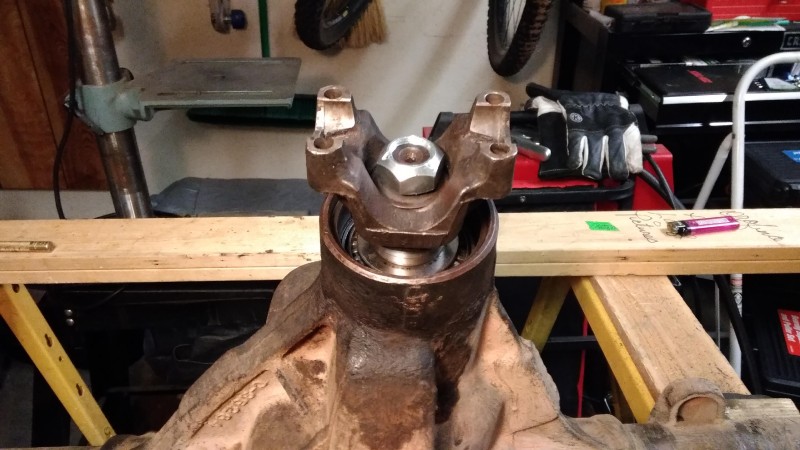
Then had to drive in the upper pinon bearing cup, slide the pinon gear up and through from the inside of the case and put the upper pinon bearing and yoke on. I heated both the bearing and the yoke so they would slide on just a bit easier.
Then torque the pinon nut to 100ft-lbs without seals or oil slinger etc just to check rotational torque. Put the yoke wrench to use again:
I still need to actually test the rotational torque - looking for something in the 12-20 inch-lbs range I believe. But I will need to check the FSM specs on some of this. If the torque is too low, the preload is too small and the bearings will not stay properly seated in the cup and the pinon/ring gear mesh will be inconsistent and probably damage the gears. If the preload is too large, the bearings will be bound too tight and will wear improperly and prematurely.
___________
James Orofino
1970 CJ5
1958 Willys Wagon
___________
James Orofino
1970 CJ5
1958 Willys Wagon
___________
James Orofino
1970 CJ5
1958 Willys Wagon
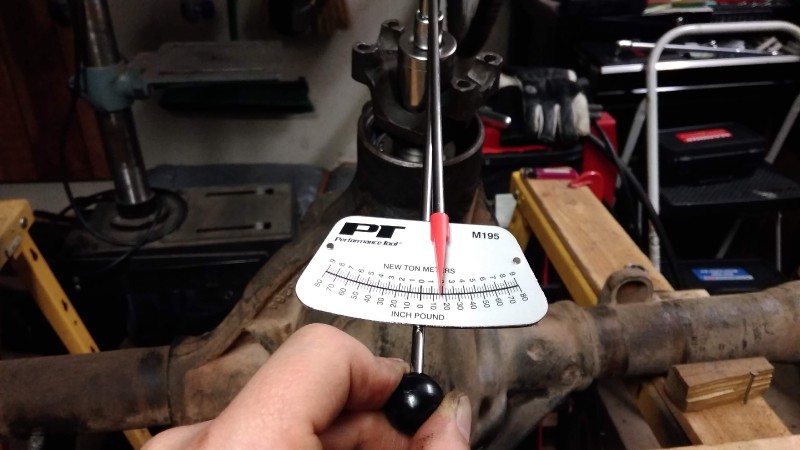
Jim (April 10th, 2019)
Ok - got my first hiccup (try and retry)...measured the rotation torque of the pinon, and it came out very low...less the 5in-lbs. When checking the specs in the FSM, it needs to be between 10-25in-lbs. I will need to remove a bit of the shim pack on the pinon shaft shoulder (between the bearings) which will increase how tightly the pinon bearings are squeezed together. This shim pack determines pre-load on the pinon bearings...and with it too low, the bearings won't stay seated in the cups under normal driving conditions, and the pinon gear will move around damaging both itself and the ring gear.
So, I reduced the shim pack from .072" to .068" (the original was .070") and now the the rotational torque is 15-17in-lbs. It did require pulling the yoke, driving the the pinon shaft out, then changing the shim pack and re-installing into the housing and re-fitting the outer pinon bearing and yoke (heat is my friend for these)...but if only 1 redo - I'll take it!
___________
James Orofino
1970 CJ5
1958 Willys Wagon
Looks good James.
Nice your learning the set up as a solid spaced unit.
The crush sleeve they use now suck.
___________
Crazy- You call me crazy, but you wouldn't know crazy if Charles Manson was eating Fruit Loops on your front porch. Suiciadl tendancies- intatutionalized
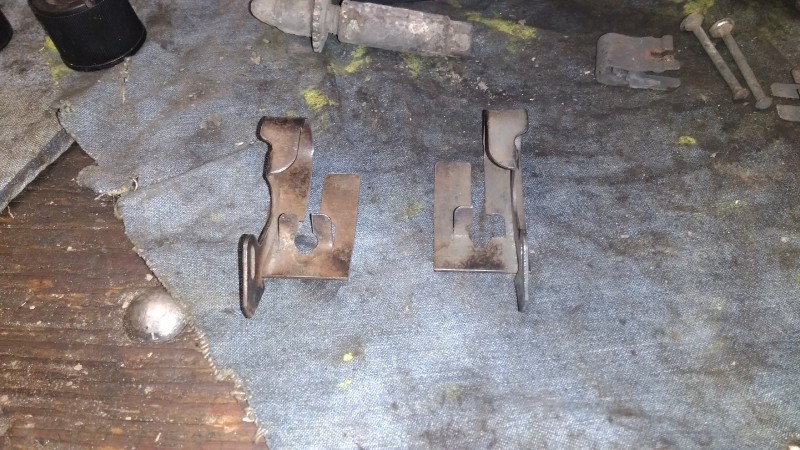
While waiting to get the set-up bearings to finish the locker install, I took care of the rear brakes. They are the oem 10" self adjusting brakes - and the self-adjusters were completely frozen so I don't think they were functioning at all. When disassembling, I found the shoe clip for the self-adjuster had a broken tab - probably not critical, but decided to fix it anyway:
the two clips - the one on the right is missing a tab in the center:
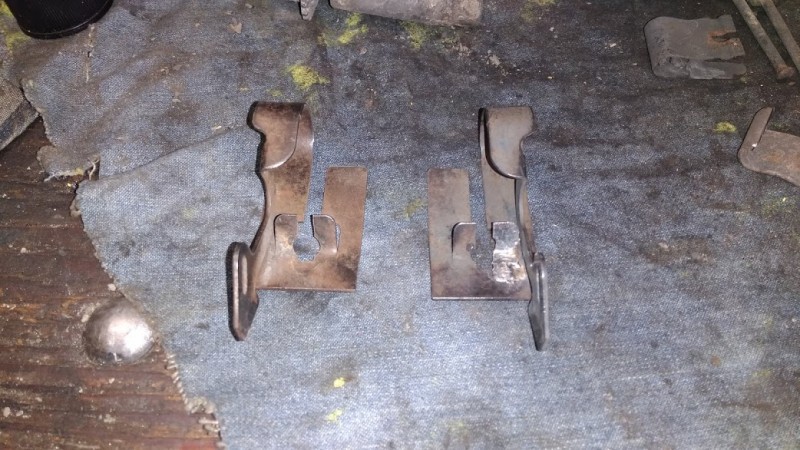
repaired - of course I did get it painted as well:
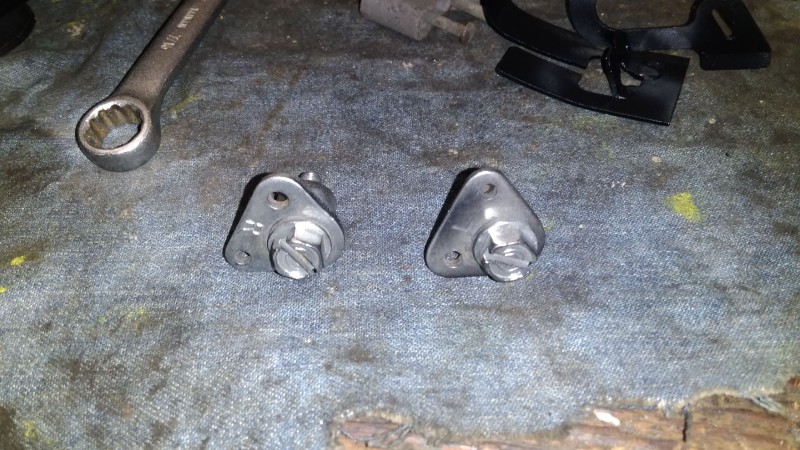
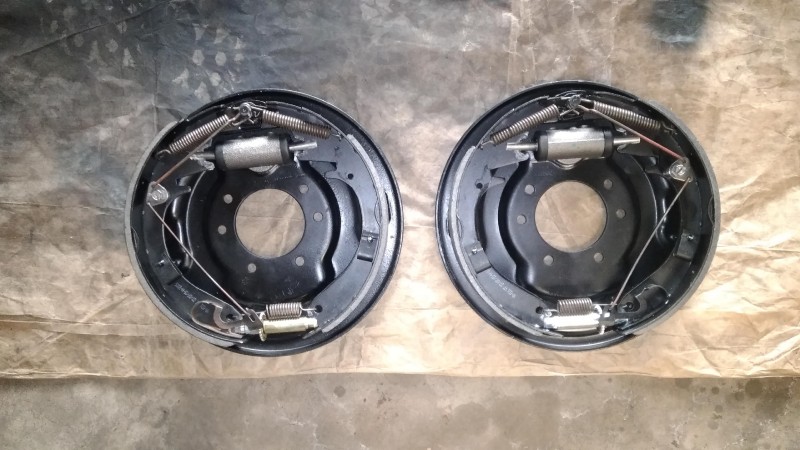
Here are the self-adjusting levers (as called by the FSM - #11 in the exploded view). It says very specifically on p311 in the FSM that the one that has the 'R' on it goes on the primary shoe for the driver rear, and the one with the 'L' on it goes on the primary shoe for the passenger rear (something about that bothers my slight OCD...but that is also how they were when I took them off):
And the finished product - ready to bolt on when the locker is good to go. If anyone sees anything wrong let me know (the driver is on the left and the passenger is on the right - both are rear brakes):
___________
James Orofino
1970 CJ5
1958 Willys Wagon
Thanks to an ecj5 member, I got some set-up bearings to finish this up. Of course, it doesn't just go back together easily. My original trac-loc case has .040" shims on the bolt side and .049" on the tooth side (I am assuming this includes the .015 for preload as well). Normally, one would start by putting the case in bearings and cups and all, without any shims to see roughly if the total amount of shims what amount of spacing was needed for zero preload - seems to be close enough around .080. I then removed and reinstalled with the shims as before...It was a lot of dead blow hammering to get it in and when it was eventually in, there was no backlash - it was too tight. Then trying to get the case back out was a complete PITA...I was about to give up. It took a lot of hammering on a small prybar to get it out, and when it came out, there were some metal shavings from the little circular edging at the ends of the carrier tubes. So I kind of feel like the preload was a bit too much - at least for test installs and removal. Can always add back in a bit more preload on final assembly. And of course I was wondering how much shim to remove on the bolt side to create some backlash.
Allright...time for the idiot moment. After getting the case out yesterday evening I called it a night and just left it on the workbench. When I went to change the shims today I realized I had the shims packs on the wrong side of the case - arghhh! The .040 should go on the bolt side and the .049 on the tooth side (fortunately I am trying to keep good written records of what I had and what I have done). So, I still removed .010 from the total (on the tooth side) to reduce preload a bit and allow it to fit in and out easier, and went with a test fit of .040 on the bolt side and .040 on the tooth side. I was thinking that would still have too little backlash but...
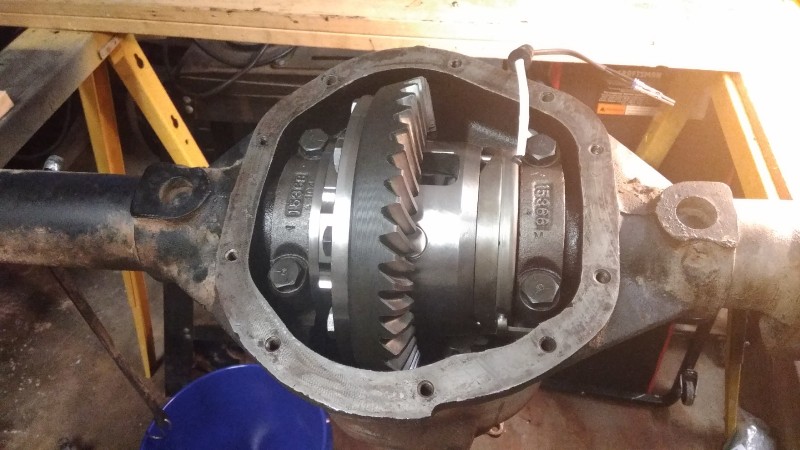
So, with .040 on the bolt side and .040 on tooth side, it was much more reasonable to get the case into the carrier, and now I am getting .008+/-.001 for backlash - which is fine and close to the .009 with the old case and same R&P. Now for a pattern test...seems pretty close to what I had before: centered between the top and root and a bit towards the toe. I took this quick so they are not the best pics - but I think they compare favorably with the old pattern posted a bit back
___________
James Orofino
1970 CJ5
1958 Willys Wagon
cnstaco (April 25th, 2019)
ok...went ahead and finalized the install. I used .040 shim on the bolt side and .050 on the tooth side (although I test fit it with .040 on the tooth side, I added an additional .010 for preload). Then heated and drove on the new bearings (if I have to take this apart, getting these bearings off without damage will be difficult). The extra preload definitely made it a bit more difficult to get the case into the carrier, but I got it in and it did not seem to do any damage. I rechecked backlash, and still just over .009" so that should be fine for this used R&P.
___________
James Orofino
1970 CJ5
1958 Willys Wagon
Great progress!!
Getting it finished up today....
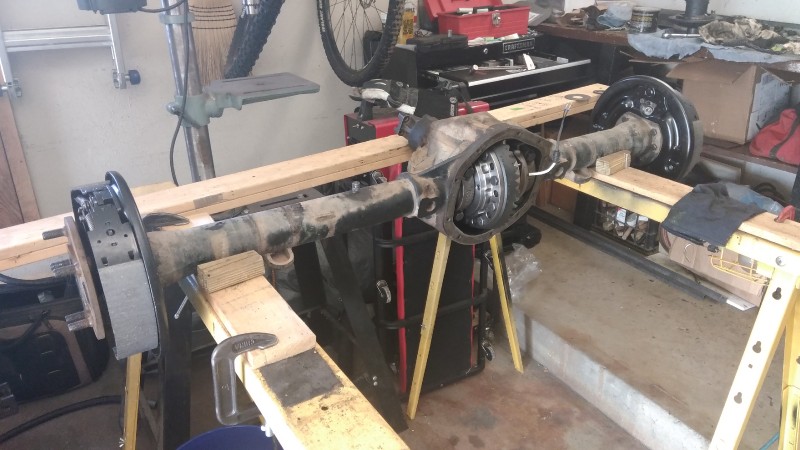
Finished up the pinon seal and yoke. Axles and brakes installed:
Then repaired, painted and installed the diff cover...Let everything sit overnight (mostly to let the RTV set-up), and then see if I can get it back under the jeep. I also have a bit of wiring to finish up as well.

___________
James Orofino
1970 CJ5
1958 Willys Wagon
Tom (April 27th, 2019)

Sweet!
FINOCJ (April 27th, 2019)
Today's a good day!
FINOCJ (April 27th, 2019)
Looks great!
 Posting Permissions

 Reply W/Quote