Front Range 4x4 Upcoming Trail Runs - Add a New Trail Run

Page 1 of 2 12 LastLast
Results 1 to 20 of 23

Thread: '01 Tacoma Expeditionish build

  1. #1
    Join Date
    Sep 2011
    Member
    #924
    Last Online
    May 25th, 2014
    Location
    Denver, CO
    Age
    34
    4x4
    2000 Jeep Cherokee
    Posts
    340
    User Name
    trailfiend
    Real Name
    Alex
    Thanks Given
    10
    Thanked 15 Times in 13 Posts

    Default '01 Tacoma Expeditionish build


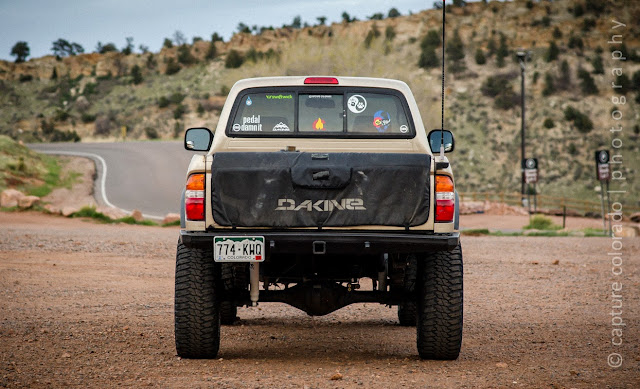
    So I've got a build thread on TacomaWorld and Expedition Portal...might as well throw it up here, too!


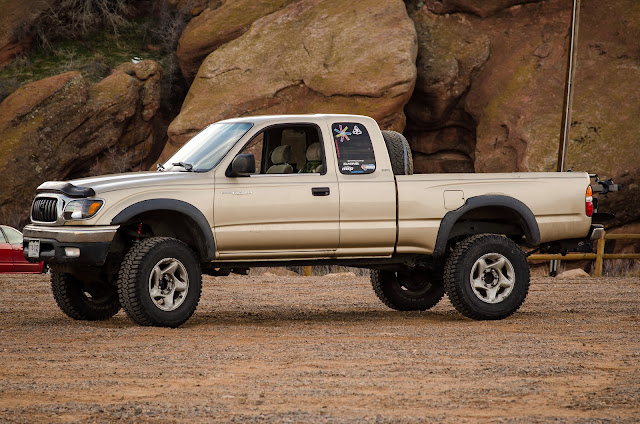
    I'll be taking inspiration from many of the rigs I've seen around the interwebs, and specifically t0mills on Tacoma World for my rack design and build. When I bought the truck it had a Leer above-cab topper, which was great if you're into that sort of thing, but one of my primary complaints with the XJ was that if I did have space for everything, getting access to something at the front of the pile, under everything, was a PITA. A topper makes this truck a larger capacity SUV...do not want (personally).


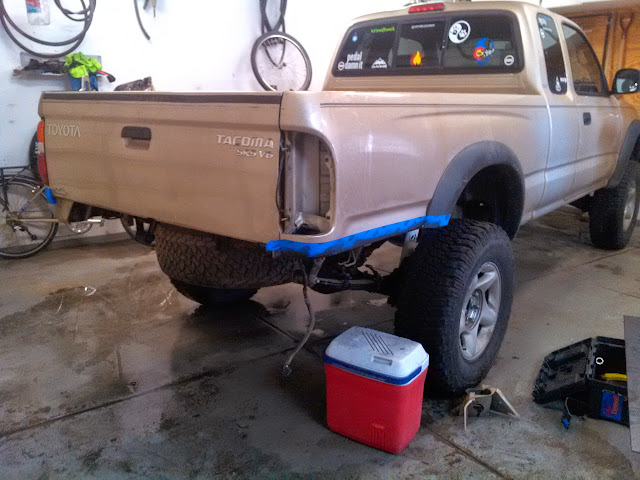
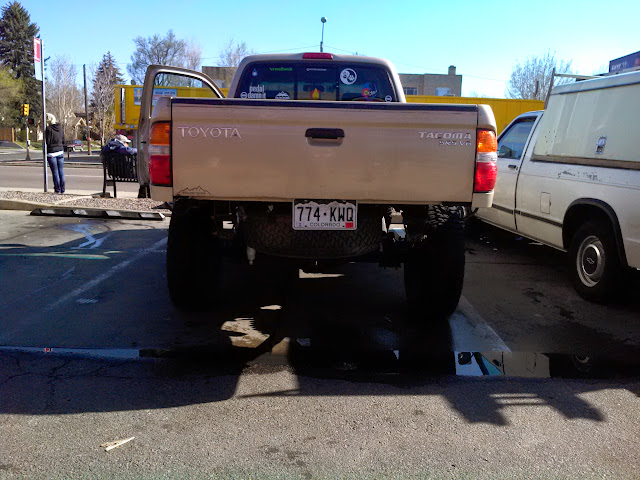
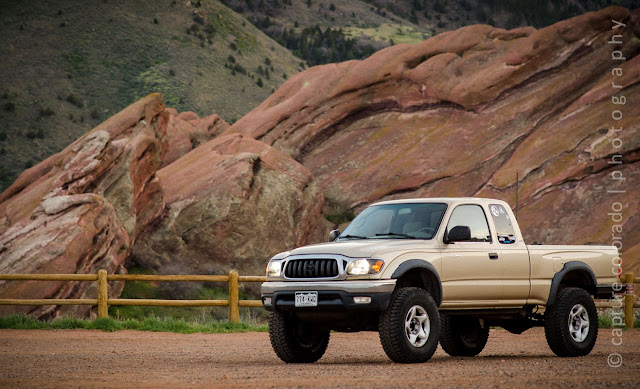
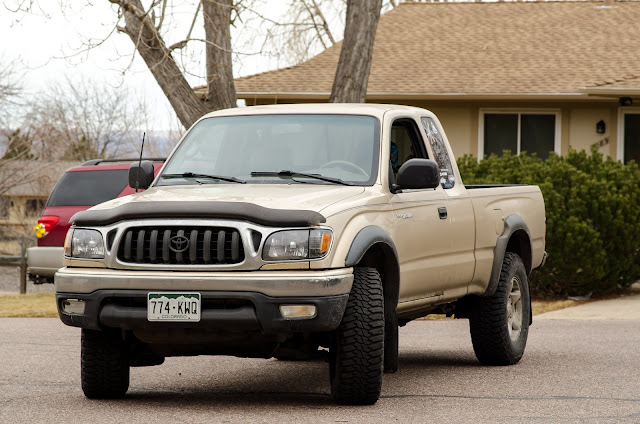
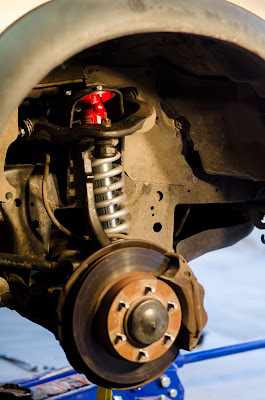
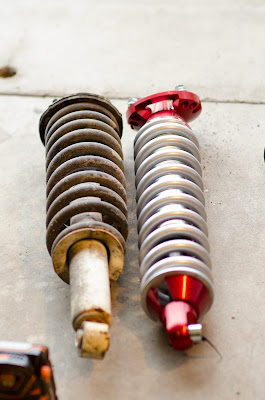
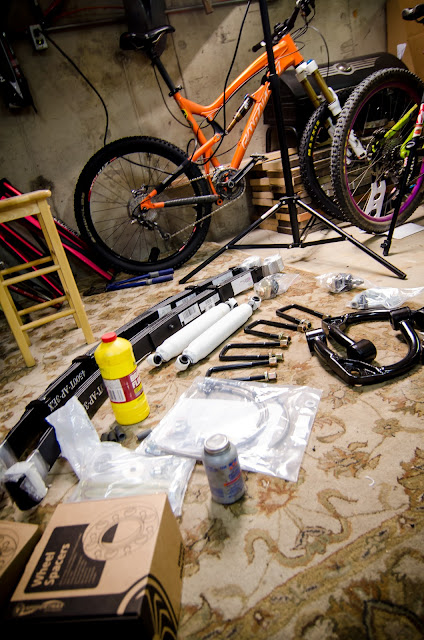
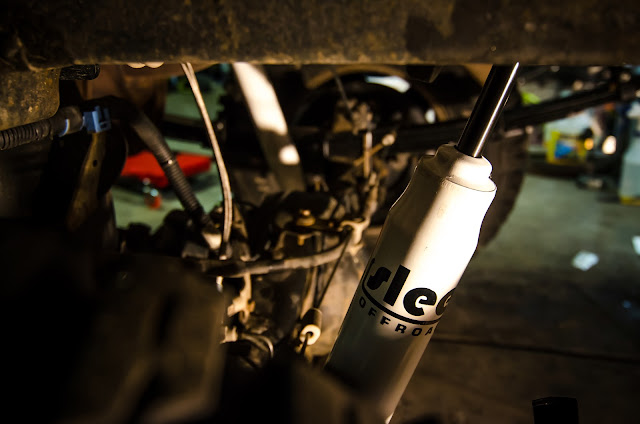
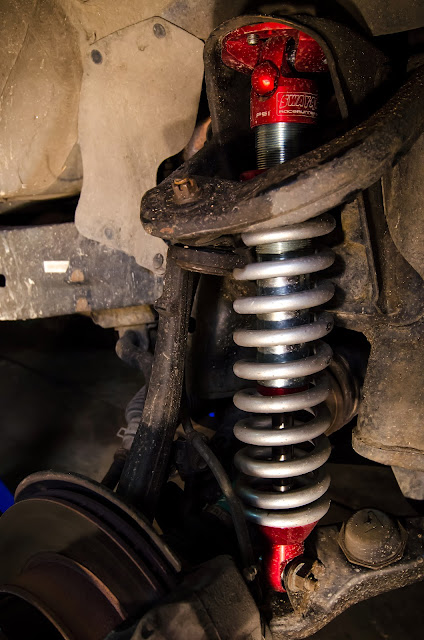
    At present the truck is sitting on stock suspension, but I've got Swayaway Racerunner shocks w/ Eibach 650# springs, All-Pro Expo springs, and a pile of other goodies on the way currently, and will be installing them within the next week or two.


    Plans for the truck include (in no particular order):
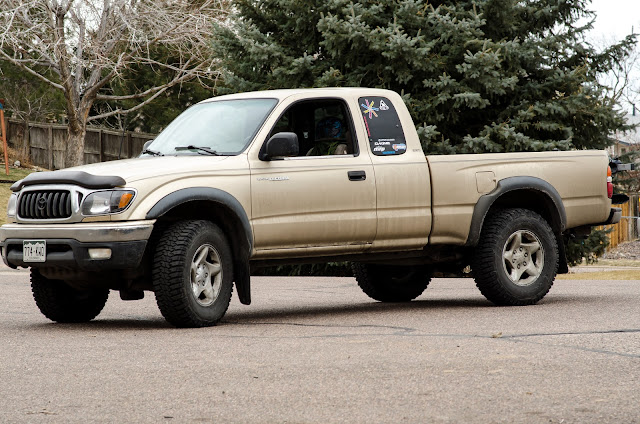
    - Lift (ordered)
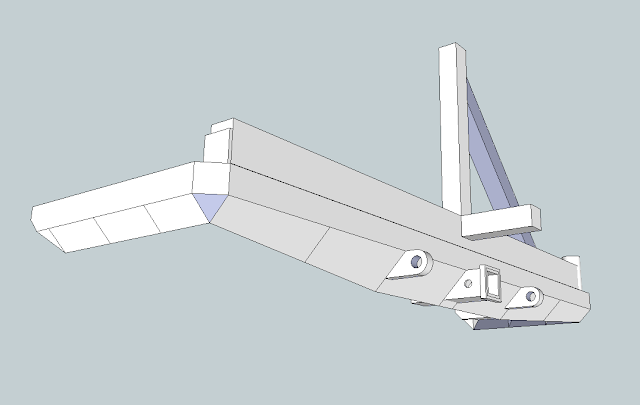
    - Front winch bumper build
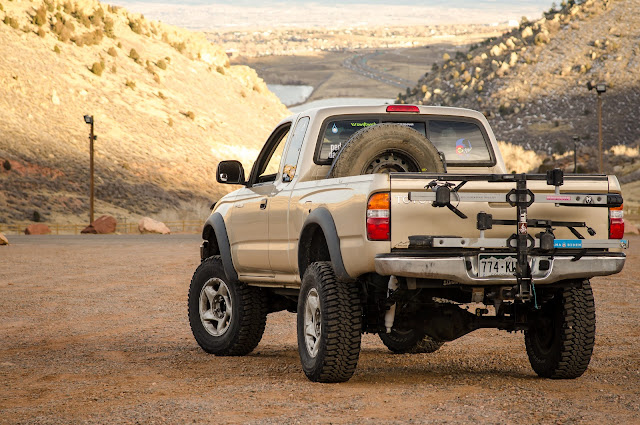
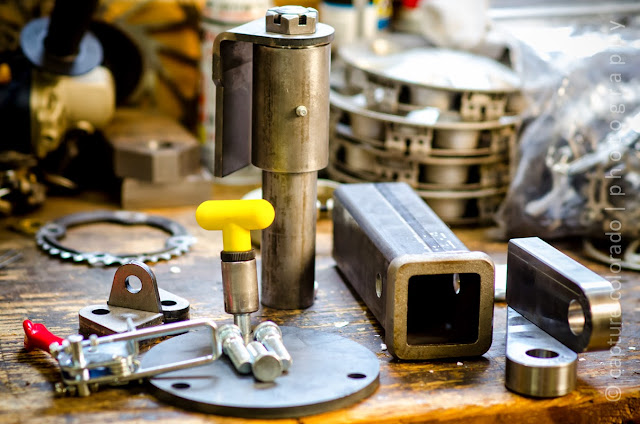
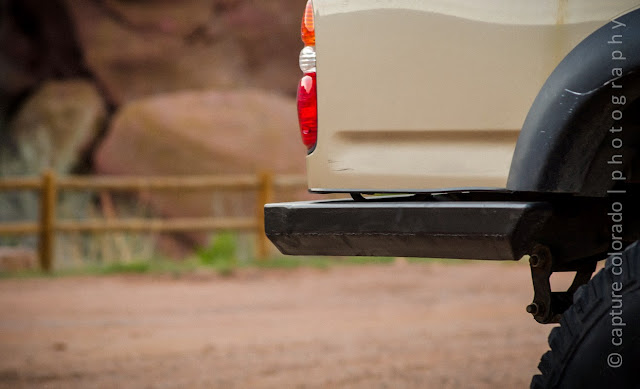
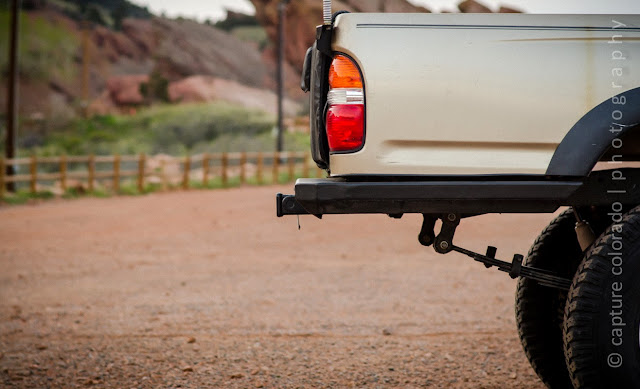
    - Rear bumper build w/ tire carrier
    - Bed rack build w/ custom canvas top
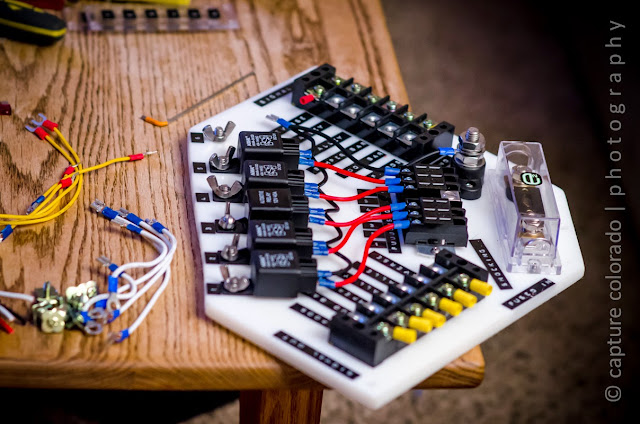
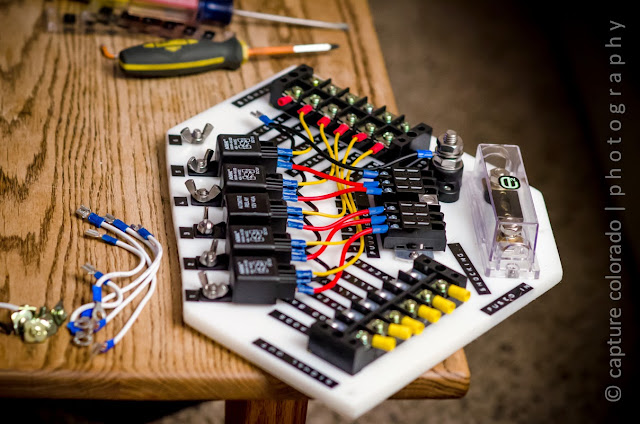
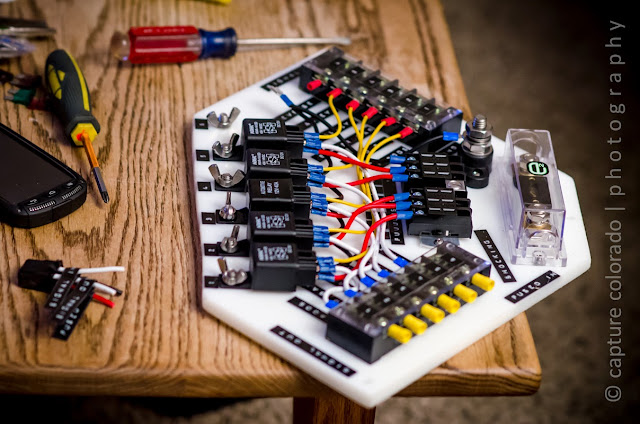
    - OBA with two 2.5-gallon air tanks hooked together
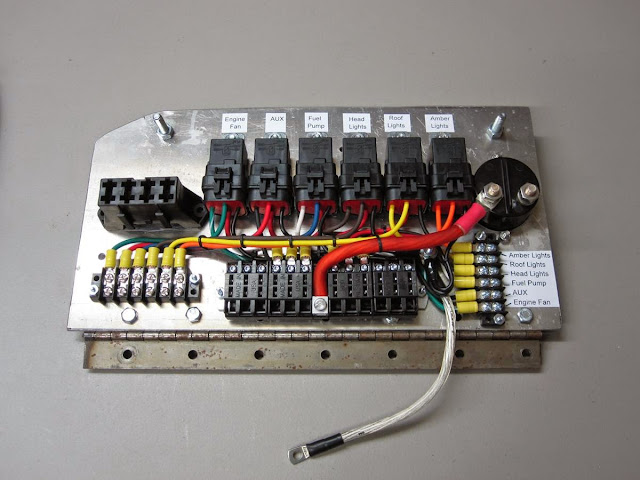
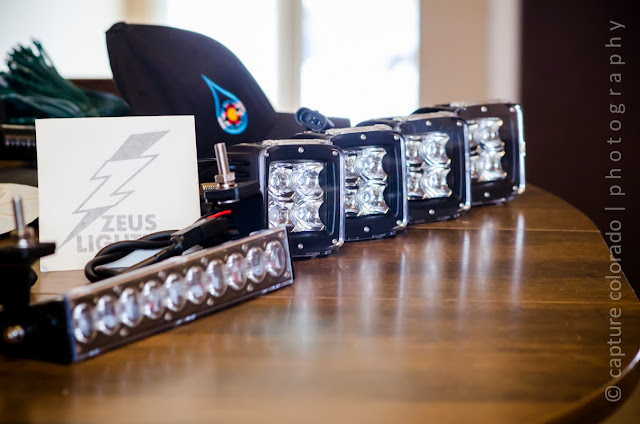
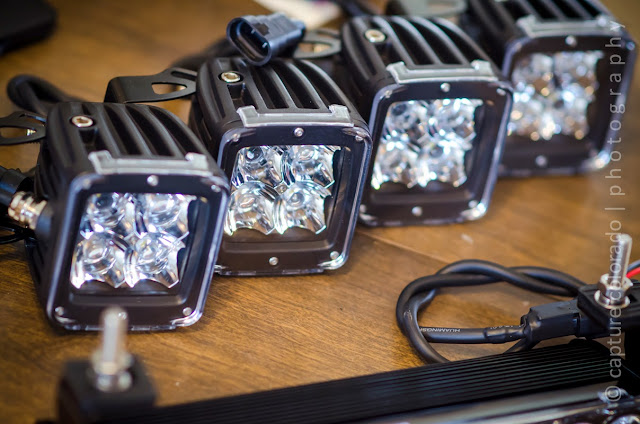
    - Lighting... lots of it. 2-per-side LED alley lights on the rack, reverse lights, and aux. driving lights.


    The bed rack is what I'm really looking forward to, it will be divided into top and bottom half (above bed rail and below) and will provide me the ability to use multiple (4-6) waterproof containers on the upper half, sourced from Plano, which will each have a lockable slot to slide into, with access to each from the passenger/driver side respectively. These cases will be used for passenger gear, clothes, bike gear, etc. rather than using bags that aren't easily secured. Below will be space for 1-2 large coolers, and 1 very large container in which camping gear will be stored (sleeping bags, tents, etc.). At the front of the bed, immediately behind the cab, I will integrate storage for Jerry cans, there will be space above for a total of 4 water cans, 2 per side and lockable; below these will be space for 2 gas cans. Resulting in 20 gallons of drinking/utility water, and 10 gallons of gas. Most of my travels will be based around mountain biking, and hiking for photographic purposes - so the ability to store and carry a large amount of water easily is key.


    Overall I look forward to commencing with the build, and moreover I look forward to being able to get out and explore. As with most of us, I'm on a tight budget so things may move rather slowly, but fortunately most of what I plan on doing is a matter of materials, time, and some spray paint - so hopefully the rack and bumpers will come together without too much delay.


  2. #2
    Join Date
    Sep 2011
    Member
    #924
    Last Online
    May 25th, 2014
    Location
    Denver, CO
    Age
    34
    4x4
    2000 Jeep Cherokee
    Posts
    340
    User Name
    trailfiend
    Real Name
    Alex
    Thanks Given
    10
    Thanked 15 Times in 13 Posts

    Default Re: '01 Tacoma Expeditionish build


    This afternoon, I bolted the coilovers in... Turns out ordering the long travel ones made it a bit interesting to bolt in, but once I figured out to disconnect the lower ball joint from the knuckle, bolt the coilover in, then jack the LCA up so I could mate the ball joint and knuckle back together, everything went pretty smoothly.


    Before...


    After.


    Old vs. new. The long travel has about 2" longer stroke over the non-LT version for greater droop.


    I've only driven these to the auto parts store so far, but I'm quite surprised that for having a 650# spring rate, they don't ride harsh at all, very smooth and well damped. Granted, I haven't upped the preload to give me the 3" lift that I'll ultimately end up at, I'm assuming that the 650# coils and Expo springs will balance out pretty well in ride quality with each other.


    Also, f*ck the stupid swaybar bolts. I was about to cut the stupid thing in half and get rid of it all together.

  3. #3
    Join Date
    Sep 2011
    Member
    #924
    Last Online
    May 25th, 2014
    Location
    Denver, CO
    Age
    34
    4x4
    2000 Jeep Cherokee
    Posts
    340
    User Name
    trailfiend
    Real Name
    Alex
    Thanks Given
    10
    Thanked 15 Times in 13 Posts

    Default Re: '01 Tacoma Expeditionish build


    This morning I got an early start to the day with a pile of parts, and a plan.


    Well, at least a pile of parts.


    After some grunting, and some cutting of the main leaf spring bolts, the truck started looking a lot more nekkid.


    Then, as if by magic (and the whole day later, a trip to Yota Jim's for a shackle, a trip to pick up a new hard line for the brake, and some lunch).... leaf springs, shocks, etc. appeared under the truck.


    Slee gave me some black die-cut stickers. Black stickers don't belong on tinted windows, and I don't want to put stickers on the sheetmetal.


    Clearly this was the wisest placement of sticker.


    Then I moved on to the front. I didn't feel like dealing with the UCA's today, so I didn't. I'll get around to that eventually. But until then, the coilovers are going to look just as good without the new UCA's.


    From the short test drive I took (up to 80mph) I don't have any vibration coming from the front end, which I'm fairly pleased about... considering I wasn't able to break the bolts free to install the diff drop kit.


    Otherwise, I'm really happy with the way it's turned out. The handling is on point, body roll is significantly reduced, the ride is smooth but firm and controlled. I also put on some Spidertrax wheel adapters/spacers to kick the track width out a bit, which added nicely to the aesthetic of the truck being lifted and sitting on 31's


    I'll get pictures of the truck tomorrow after work.

  4. #4
    Join Date
    Sep 2011
    Member
    #924
    Last Online
    May 25th, 2014
    Location
    Denver, CO
    Age
    34
    4x4
    2000 Jeep Cherokee
    Posts
    340
    User Name
    trailfiend
    Real Name
    Alex
    Thanks Given
    10
    Thanked 15 Times in 13 Posts

    Default Re: '01 Tacoma Expeditionish build


    Got the chance to get some updated pictures of the truck tonight.


    It's really not as raked out as I thought it would look. The coils are cranked to do 3" lift, and the expos are supposed to give 4" lift when unloaded. I think it looks good like this.


  5. #5
    Join Date
    Sep 2011
    Member
    #924
    Last Online
    May 25th, 2014
    Location
    Denver, CO
    Age
    34
    4x4
    2000 Jeep Cherokee
    Posts
    340
    User Name
    trailfiend
    Real Name
    Alex
    Thanks Given
    10
    Thanked 15 Times in 13 Posts

    Default Re: '01 Tacoma Expeditionish build


    While I was at the alignment shop this morning, I had some time to kill.


    So I killed time. Killed it good.


    This design uses simple dimensions (all 3/16" wall), 2x6" tube for the top, 4" plate for the large bevel, and 2" plate for the small bevels. The large portion will be supported by multiple 3"x3" gussets, and the sides will be supported by 1.5"x1.5" gussets. I'm also ordering tire carrier parts tonight, dual sheer spindle, latch, pop pin, etc. I'm thinking about doing something rather unusual with the tailgate, as well. With my XJ I grew tired of having to deal with bikes on the rack, swingout tire carrier, and the hatch. Too damn many processes to deal with. I'm contemplating unbolting the hinge pieces from the tailgate, and bolting the tailgate to the swingout itself - think tiregate, but more useful. I'd still be able to detach it and use the tailgate as a tailgate if I need to, but as long as the tire carrier is there, the tailgate will be useless to have open downward. It would attach easily via bolts and spacers through the sheet metal to tabs on the swingarm, pretty straight forward and non-permanent.


    I also convinced the guys to throw their impact wrench on the seized front diff bolts, and help me throw the diff drop kit in. Cost me nothing, too

  6. #6
    Join Date
    Sep 2011
    Member
    #924
    Last Online
    May 25th, 2014
    Location
    Denver, CO
    Age
    34
    4x4
    2000 Jeep Cherokee
    Posts
    340
    User Name
    trailfiend
    Real Name
    Alex
    Thanks Given
    10
    Thanked 15 Times in 13 Posts

    Default Re: '01 Tacoma Expeditionish build


    I've been stockpiling parts for a couple of weeks now for a few projects...


    Rear bumper - I have everything I need to get started on that, except enough time to go through and start doing everything. I need to trim the bed a little bit before I can fully start on the project.
    - 800# latch
    - pop pin
    - dual-sheer tire carrier spindle
    - tire carrier plate
    - 2" receiver
    - two Ballistic shackle mounts
    - miscellaneous tabs, which I'm probably not going to end up using, but they're here.
    - 2x6, 2x2, 2", 3", and 4" rectangular tube and plate steel, all 3/16" thick.


    Then today, I picked up some shiny for the front bumper that may or may not be on its way here... If UPS could pull their heads out of their asses and figure out where it is, I can get started on some stuff. Basically I decided to get a Trail-gear low profile front bumper, if I end up not liking the tube I'll just scrap the tubing and build off of the existing foundation. But I think I'll like the tube.


    I decided to start working on my lighting situation. I wanted to do it right this time... With my Jeep, while it worked just fine, it was kind of a chaotic system, not as well organized as I had hoped it would be, and a challenge to add anything. Also no labels, so if I had to change a relay or fuse, it wasn't clear which was which. So in addition to shiny bright things, I've got a sheet of HDPE to use as the base for my fuse/relay panel, aaaand a bunch of other parts to replicate this to a degree. I'll pre-cut, and wrap together signal wires to go from the switches to the relays, which will all connect via terminal block, and a 6-way plug at the switch panel for easy reworking of the wiring. Each system that connects to the panel will connect with a weatherpack connector, so I can completely remove the wiring for an individual set of lights. Everything will be LED, so the current draw on the system will be pretty low overall; I'll probably never have ALL the lights on at once (1-2 10" bars on the bumper, 4 forward-facing pods, two small flood pods on either side of the rack, and aux. reverse/loading lights).


    New shiny... 4x 16w pods, and 1 50w 10" bar from local guys Olympus Offroad, they're also going to hook it up with some of their 18w bolt rock lights that should prove very useful for illuminating the bed, and obviously for rock lights. I'm not sure if the rock lights will project enough to act as alley lights, but that would be pretty rad.


    On a side note, if you're in the market for some really well-built LEDs for not the price of Rigid, these guys are worth checking out. And Daniel is a really cool dude, I might have the opportunity to do some photography for those guys coming up, and look forward to working with them some more. They also have some great LED headlight upgrades that I've been running for a little white that work great.
    olympusoffroad.com

  7. #7
    Join Date
    Mar 2008
    Member
    #110
    Last Online
    April 6th, 2019
    Location
    Morrison, CO
    Age
    49
    4x4
    Toyota/Scout/Nissan
    Posts
    4,961
    User Name
    Patrolman
    Real Name
    Jeff
    Thanks Given
    182
    Thanked 346 Times in 298 Posts

    Default Re: '01 Tacoma Expeditionish build


    That sure is progress! Looking good!

  8. #8
    Join Date
    Mar 2013
    Member
    #1194
    Last Online
    August 21st, 2018
    Location
    Fort Collins
    Age
    44
    4x4
    2008 Toyota Tacoma DCLB SR5
    Posts
    881
    User Name
    ILuvtheMountains
    Real Name
    Travis
    Thanks Given
    40
    Thanked 59 Times in 53 Posts

    Default Re: '01 Tacoma Expeditionish build


    Great looking build! Did you check the travel up front? If you got long travel front shocks but didn't extend the control arms in any way you may run the risk of bottoming out those shocks before hitting the bump stops. You may have already thought of that but figured I should ask.

  9. #9
    Join Date
    Nov 2010
    Member
    #748
    Last Online
    June 26th, 2022
    Location
    denver co
    4x4
    94' toyota PU, 89 yj
    Posts
    2,258
    User Name
    94ToyBear
    Real Name
    Adam
    Thanks Given
    107
    Thanked 153 Times in 120 Posts

    Default Re: '01 Tacoma Expeditionish build


    Coool build ! What are you doing with the old rear springs ?

  10. #10
    Join Date
    Sep 2011
    Member
    #924
    Last Online
    May 25th, 2014
    Location
    Denver, CO
    Age
    34
    4x4
    2000 Jeep Cherokee
    Posts
    340
    User Name
    trailfiend
    Real Name
    Alex
    Thanks Given
    10
    Thanked 15 Times in 13 Posts

    Default Re: '01 Tacoma Expeditionish build


    NativeTaco previously posted:
    "Great looking build! Did you check the travel up front? If you got long travel front shocks but didn't extend the control arms in any way you may run the risk of bottoming out those shocks before hitting the bump stops. You may have already thought of that but figured I should ask."

    So I compared the stroke lengths of the lift shocks and stock struts, and noticed the up travel increase is a pretty minor difference, but there's almost a full 2" of additional droop with these over a strut. I'm not tremendously concerned with bottoming the shock out, these things are insanely burly, and there's a huge poly bump stop on the shock shaft itself. The biggest thing with these, from my understanding, is that you need aftermarket UCA's as they have greater range of travel in the ball joint or whatever replaces the ball joint to allow droop....

    And I haven't gotten around to installing my UCA's, I need to get on that, but I'm lazy.

    94ToyBear previously posted:
    "Coool build ! What are you doing with the old rear springs ?"

    Another guy on here, whose name I can't currently recall, had expressed some interest in the springs; you got a project in mind? They're mostly roached.

  11. #11
    Join Date
    Nov 2010
    Member
    #748
    Last Online
    June 26th, 2022
    Location
    denver co
    4x4
    94' toyota PU, 89 yj
    Posts
    2,258
    User Name
    94ToyBear
    Real Name
    Adam
    Thanks Given
    107
    Thanked 153 Times in 120 Posts

    Default Re: '01 Tacoma Expeditionish build


    If they are the same as an 2009/10 I can use them as spares. I currently have them on my 94 pick up project. If they are the same and the other guy dont take them id be interested.

  12. #12
    Join Date
    Jun 2011
    Member
    #867
    Last Online
    2 Hours Ago
    Location
    Englewood
    4x4
    Jeep Cherokee XJ
    Posts
    3,568
    User Name
    xaza
    Real Name
    Cliff
    Thanks Given
    172
    Thanked 595 Times in 447 Posts

    Default Re: '01 Tacoma Expeditionish build


    lot of progress, looks good
    ___________
    We do not remember days, we remember moments.

    Cesare Pavese

  13. #13
    Join Date
    Mar 2013
    Member
    #1195
    Last Online
    February 24th, 2019
    Location
    Erie CO & Butte MT
    4x4
    Jeep Comanche
    Posts
    1,795
    User Name
    dscowell
    Real Name
    Dante
    Thanks Given
    215
    Thanked 212 Times in 180 Posts

    Default Re: '01 Tacoma Expeditionish build


    This is off to a great start! Bed rack will be sweet I sure want to see how you go about doing it as that is something I want to do in the future.

  14. #14
    Join Date
    Sep 2011
    Member
    #924
    Last Online
    May 25th, 2014
    Location
    Denver, CO
    Age
    34
    4x4
    2000 Jeep Cherokee
    Posts
    340
    User Name
    trailfiend
    Real Name
    Alex
    Thanks Given
    10
    Thanked 15 Times in 13 Posts

    Default Re: '01 Tacoma Expeditionish build


    Got started on a few projects today. First, started the rear bumper; today was pretty much running errands and removing the stock bumper/hitch, and trimming the bed for the new bumper.


    I'm no stranger to cutting sheet metal off of a vehicle, so this didn't particularly phase me. But the ridiculous amount of metal you've got to cut through on the corners is a headache.


    Also, all I had today was my camera phone, so these pictures are teh suck.


    Once everything was removed and I had clear access to the frame, I got started with some bumper mounts.


    I'm going to make a "template" mount, that way if I ever want/need to build another bumper for anyone in the future I'll have the basis on which to do so easily. I also decided I'm going to add at least one additional bolt to the mounting plates on the frame rail, potentially two. I might also get some extra material and weld a crossmember in between the frame rails on the back end. Dunno yet. Either way, the 'template' will have some 3/32" or 1/4" holes drilled in it at the locations of the bolts, and the outer dimensions needed for the mounts, that way I can line it up with the new material in the future and punch the holes through, then enlarge with the step bit to the required size.


    The truck looks a little weird without an ass. A little later in the afternoon I went to another parts store and picked up some door edge guard for the cut edge; it cleaned up the look substantially.


    I may have mentioned this before, but while the wiring of aftermarket crap on my jeep worked, it didn't look good, nor was it organized in any sense of the word (ok, it was, but no where near what I would expect of myself). In ordering lights, etc., I've also ordered parts to build a proper relay and fuse panel, so everything is in one location, easily organized, serviced, and diagnosed for issues.


    Getting started on the panel with a 12" square piece of 3/8" HDPE. I chose HDPE because it's non-conductive, corrosion-resistant/proof, and extremely easy to work with. But mostly because it's non-conductive. All the hardware on this is stainless steel, as well.


    All it needs now is some wires. Input will be fused 150a into the fuse panel, signal wires from the switches in the cab to the relays on the right, power from the relay to the device is on the left, with a group ground adjacent to the fuse panel. All the relays' grounds will be looped together in a row to keep things clean, and each relay is held on securely with a wing nut on a carriage bolt which is jammed into the HDPE, so there's a non-permanent way of mounting the relays so they can be replaced without the need of tools in the field.


    That's all for now. Tomorrow I'm going back to my parents garage to continue working on the bumper, and will be picking up additional material to make a second bumper for a guy on TacomaWorld.

  15. #15
    Join Date
    Sep 2011
    Member
    #924
    Last Online
    May 25th, 2014
    Location
    Denver, CO
    Age
    34
    4x4
    2000 Jeep Cherokee
    Posts
    340
    User Name
    trailfiend
    Real Name
    Alex
    Thanks Given
    10
    Thanked 15 Times in 13 Posts

    Default Re: '01 Tacoma Expeditionish build


    Got a chance to pretty much wrap up the panel tonight. I've decided that I'm going to wire in an additional relay going to all the forward-facing lights (total of 3 switches), and have that relay triggered by the high beam signal, so that I can have all the front lights on w/ high beams, and quickly switched off when the highs are turned off in the cab - that way I can have one, two, or all the lights on at once on a highway or back road, then quickly off as needed without fumbling to hit several switches.


    So there's that.


    And there's this:


    All laid out, with the ground wires looped together to a ground stud (black, duh, 16awg).


    Added the fused lines into the relays (red 16awg).


    Signal wires from in-cab switches (yellow 18awg).


    And finally, the signal out, once the switch is turned on and the current connects via the yellow, fused power exits via the white wires to the lights. (white 16awg). Needs some zip ties and it'll be all wrapped up.


    The current draw on these LEDs is so low, that I think the 16awg wires should suffice for these short distances... not to mention, the lights all came with 16awg wire making up the harnesses, and I'll ultimately be using 10awg, mostly for having a more robust cabling; but also because I plan on running all 4 bumper pods from 1 relay and fuse over a potentially long span of wire, so I wanted to be able to take into account current loss over that distance.


    And Amazon had red/black mated 10awg speaker wire for cheap

  16. #16
    Join Date
    Sep 2011
    Member
    #924
    Last Online
    May 25th, 2014
    Location
    Denver, CO
    Age
    34
    4x4
    2000 Jeep Cherokee
    Posts
    340
    User Name
    trailfiend
    Real Name
    Alex
    Thanks Given
    10
    Thanked 15 Times in 13 Posts

    Default Re: '01 Tacoma Expeditionish build


    So.. a fair amount has happened in the last couple of weeks.


    I got some 285/75r16's on CL for a solid deal. Even more, they're TreadWright Guard Dog's on BFG casings, just like the 265/70's I already had, plus brand new full size spare. I'm happy with it. Truck looks good, handles great, could possibly use a regear, but not sure how much I care. MPG dropped maaayybe by 1mpg too.


    I also finished the rear bumper prototype, and I'm very happy with the design, it completely changes the look of the truck. Today I started working on the final versions, tomorrow I expect to get the plating done, as well as the spindles welded in for the tire carriers, once that's all set, I should be able to get the swingarms wrapped up pretty promptly.


    Also ordered a Relentless Fab DIY front bumper kit, it looks like it should blend well with the lines of my rear bumper


    Anywho, picture time. Because let's face it, none of you internet folk really care what I say, it's all about the pretty pictures.


    Little dusty...


    My trim line was nice and straight at first, then I had to trim it down some more.


  17. #17
    Join Date
    Mar 2008
    Member
    #97
    Last Online
    May 13th, 2019
    Location
    Conifer, CO
    Age
    41
    4x4
    '92 Range Rover
    Posts
    7,000
    User Name
    Funrover
    Real Name
    Aaron
    Thanks Given
    79
    Thanked 141 Times in 121 Posts

    Default Re: '01 Tacoma Expeditionish build


    Man I really like how the rig is coming along! I am also glad to see/read about the care you are taking while doing up all of the wiring. Really coming along great there man! look forward to it being all complete.(which lets face it, that never actually happens).

  18. #18
    Join Date
    Mar 2008
    Member
    #110
    Last Online
    April 6th, 2019
    Location
    Morrison, CO
    Age
    49
    4x4
    Toyota/Scout/Nissan
    Posts
    4,961
    User Name
    Patrolman
    Real Name
    Jeff
    Thanks Given
    182
    Thanked 346 Times in 298 Posts

    Default Re: '01 Tacoma Expeditionish build


    Where do you plan to mount the wire board?

  19. #19
    Join Date
    Sep 2011
    Member
    #924
    Last Online
    May 25th, 2014
    Location
    Denver, CO
    Age
    34
    4x4
    2000 Jeep Cherokee
    Posts
    340
    User Name
    trailfiend
    Real Name
    Alex
    Thanks Given
    10
    Thanked 15 Times in 13 Posts

    Default Re: '01 Tacoma Expeditionish build


    Funrover previously posted:
    "Man I really like how the rig is coming along! I am also glad to see/read about the care you are taking while doing up all of the wiring. Really coming along great there man! look forward to it being all complete.(which lets face it, that never actually happens)."

    Thanks! I'm looking forward to getting everything wired up and installed. I told myself the other day that this is a truck that I could potentially foresee actually being complete one day.

    Then I realized how silly that was. I mean, it might happen, but it's unlikely.

    Jeff, there's a corner (passenger, furthest back) that I think I can mount it in the engine bay fairly effective. I'm not quite sure how I'll bolt it in there, but I'm pretty sure it'll fit nicely in there.

  20. #20
    Join Date
    Sep 2011
    Member
    #924
    Last Online
    May 25th, 2014
    Location
    Denver, CO
    Age
    34
    4x4
    2000 Jeep Cherokee
    Posts
    340
    User Name
    trailfiend
    Real Name
    Alex
    Thanks Given
    10
    Thanked 15 Times in 13 Posts

    Default Re: '01 Tacoma Expeditionish build


    Picked up something sweet this evening.


    A customer of the shop's came by in his Dodge the other day, he has a Softopper on the Dodge, and I hadn't gotten a close look at one ever, so I asked him some questions and we got to talking about the Taco, he just so happened to have a Softopper kicking around from his 94 pickup. Tonight we checked the fit and boom - perfect!


    Screaming deal. Not sure yet how this will effect my rack/cargo scheme and ideas, but I couldn't pass up the price.


Page 1 of 2 12 LastLast

Similar Threads

  1. My old Tacoma
    By EldoradoFJ60 in forum Member 4x4 Photo Gallery
    Replies: 3
    Last Post: May 21st, 2011, 05:44 AM

Posting Permissions

  • You may not post new threads
  • You may not post replies
  • You may not post attachments
  • You may not edit your posts
  •  
BACK TO TOP